Update 5/5/2022
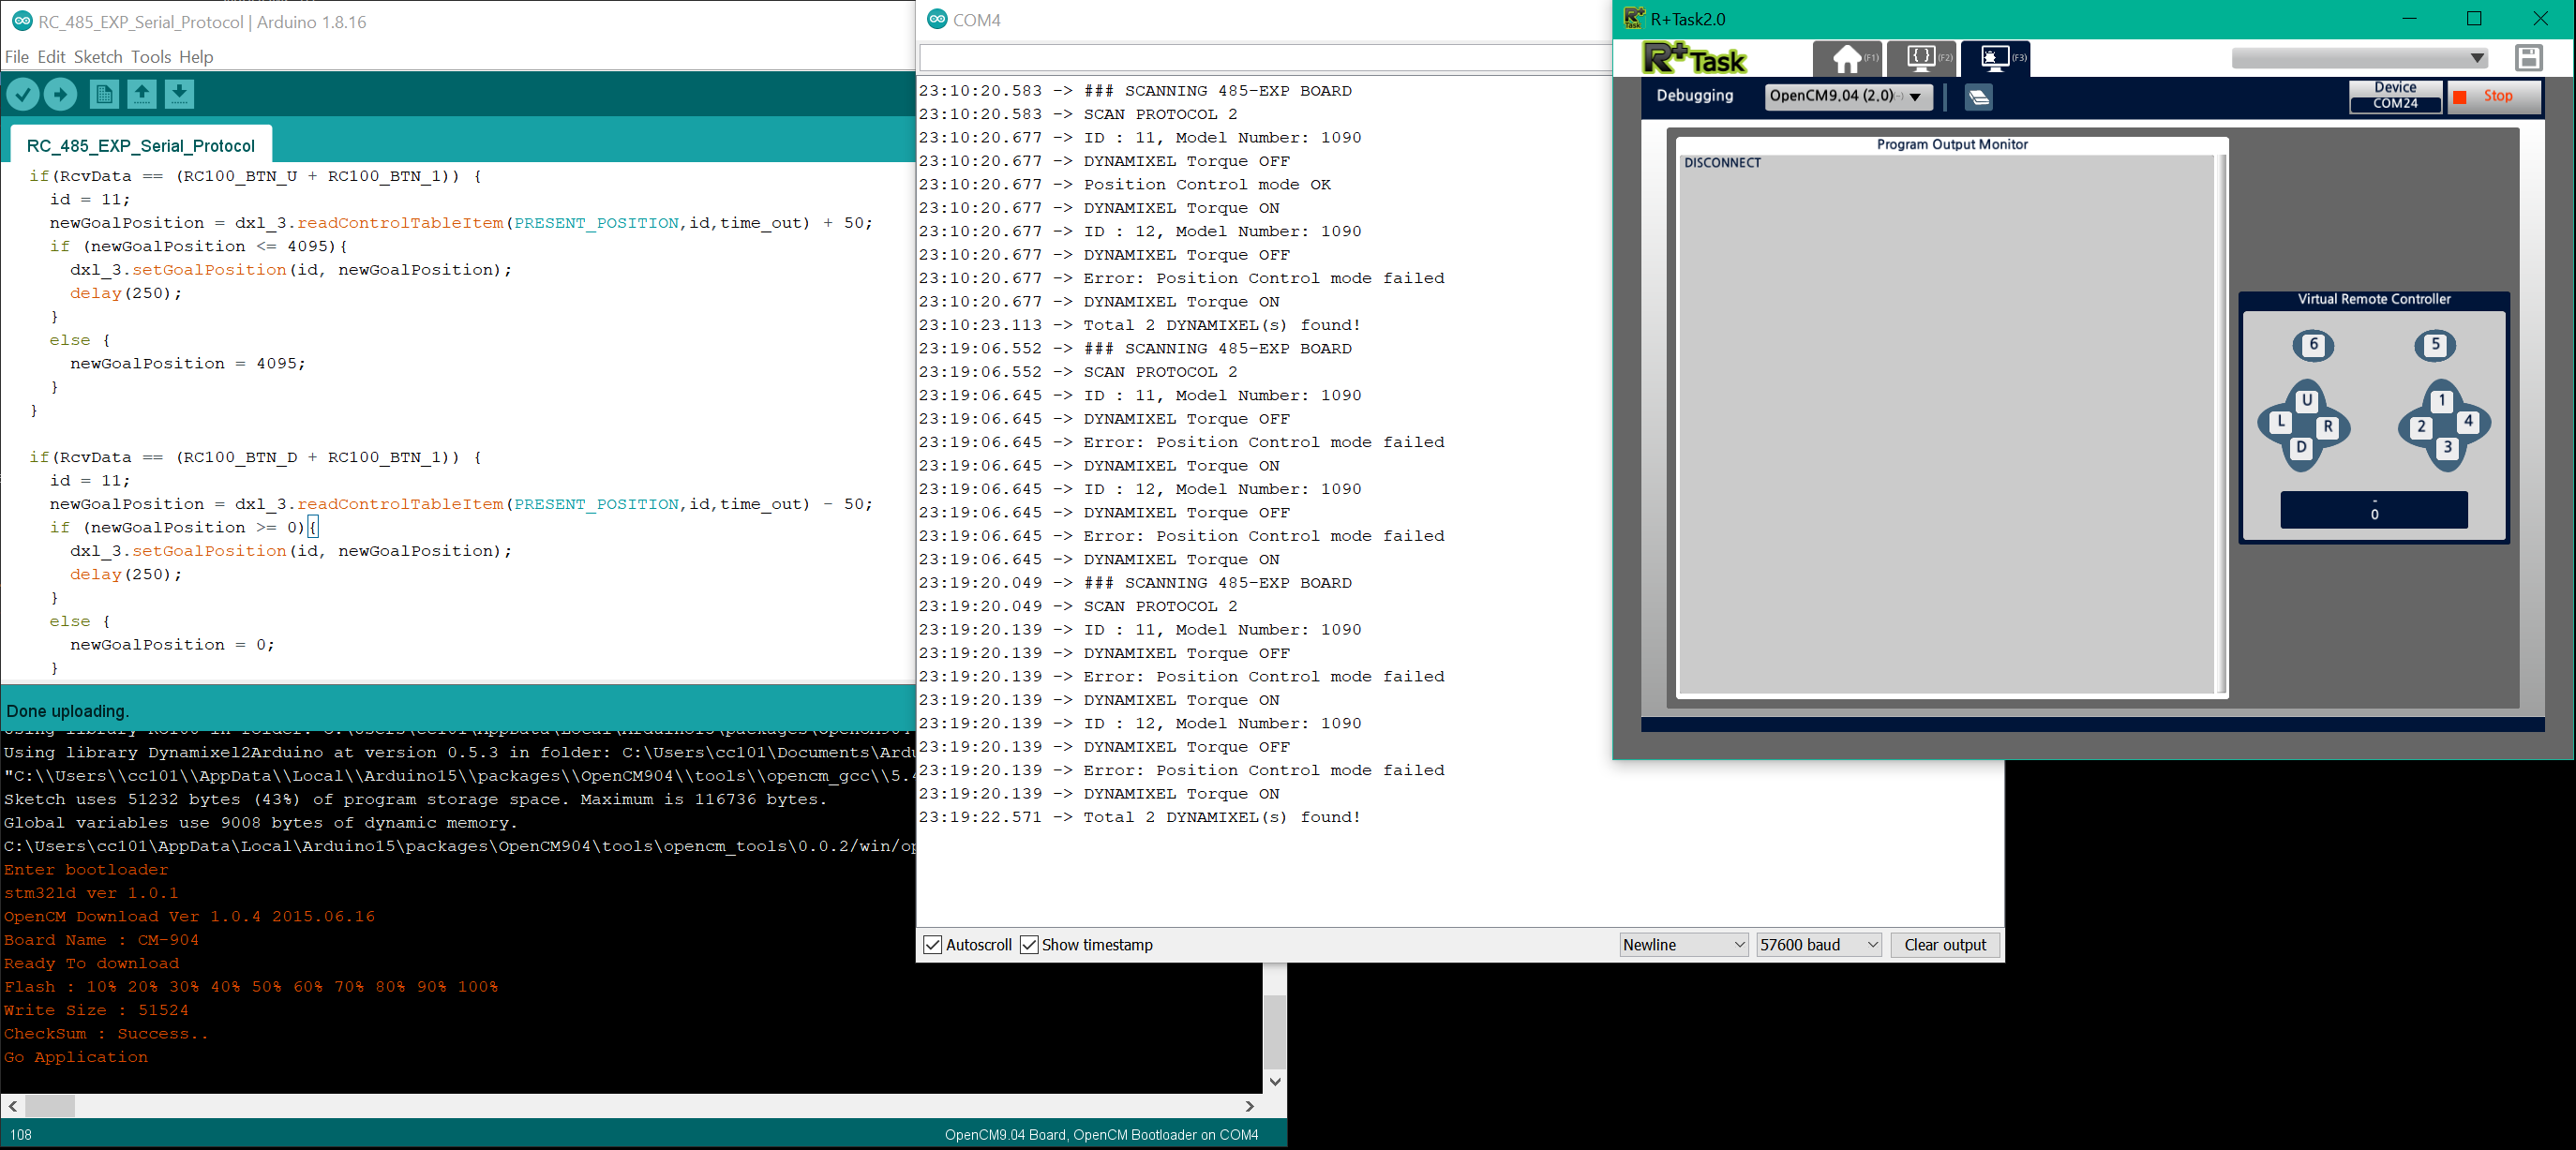
Success! I have found a solution for a 2XL-430 (ID=11 and 12) hooked up on 485-EXP and powered at 12V, while the OpenCM-904/C is separately powered at 7.4V. I am using a USB Cable (COM4) to download the sketch “RC_485_EXP_Serial_Protocol.ino” listed below from ARDUINO 1.8.16 on the PC (Windows 10). I am also using a USB BT-410 Dongle on the PC (COM24) and on the OpenCM-904/C a BT-410 Receiver connected to its 4-pin UART Port (i.e. Serial2). I also use the Debugging Tool on TASK V.2 to act as a Virtual RC-100 Controller (see screen capture below):
The listing of the sketch “RC_485_EXP_Serial_Protocol.ino” follows (note that it uses only “RC100.h” and “Dynamixel2Arduino.h”:
#include <RC100.h>
#include <Dynamixel2Arduino.h>
#define DXL_SERIAL_3 Serial3 //Serial3 is for DXL Port going to 485-EXP Board
#define DEBUG_SERIAL Serial
const uint8_t DXL_DIR_PIN_3 = 22; //“22” is DIR_PIN for 485-EXP Board
Dynamixel2Arduino dxl_3(DXL_SERIAL_3, DXL_DIR_PIN_3);
RC100 Controller;
uint16_t RcvData = 0;
uint32_t newGoalPosition = 0;
uint8_t id = 0;
uint32_t time_out = 100;
//This namespace is required to use Control table item names
using namespace ControlTableItem;
void setup() {
// put your setup code here, to run once:
Controller.begin(2);
int8_t found_dynamixel = 0;
// Use UART port of DYNAMIXEL Shield to debug.
DEBUG_SERIAL.begin(57600); //set debugging port baudrate to 57600 bps
while(!DEBUG_SERIAL); //Wait until the serial port is opened
dxl_3.begin(1000000); // need to match with DXLs baud rate used via Dynamixel Wizard
int8_t protocol = 2;
dxl_3.setPortProtocolVersion((float)protocol);
DEBUG_SERIAL.println("### SCANNING 485-EXP BOARD ");
DEBUG_SERIAL.print("SCAN PROTOCOL ");
DEBUG_SERIAL.println(protocol);
for(int id = 0; id < DXL_BROADCAST_ID; id++) {
//iterate until all ID in each baudrate is scanned.
if(dxl_3.ping(id)) {
DEBUG_SERIAL.print("ID : “);
DEBUG_SERIAL.print(id);
DEBUG_SERIAL.print(”, Model Number: ");
DEBUG_SERIAL.println(dxl_3.getModelNumber(id));
found_dynamixel++;
if (dxl_3.torqueOff(id))
DEBUG_SERIAL.println(“DYNAMIXEL Torque OFF”);
else
DEBUG_SERIAL.println(“Error: Torque OFF failed”);
if (dxl_3.setOperatingMode(id, (float) OP_POSITION)) // Position Control mode
DEBUG_SERIAL.println(“Position Control mode OK”);
else
DEBUG_SERIAL.println(“Error: Position Control mode failed”);
if (dxl_3.torqueOn(id))
DEBUG_SERIAL.println(“DYNAMIXEL Torque ON”);
else
DEBUG_SERIAL.println(“Error: Torque ON failed”);
}
}
DEBUG_SERIAL.print(“Total “);
DEBUG_SERIAL.print(found_dynamixel);
DEBUG_SERIAL.println(” DYNAMIXEL(s) found!”);
dxl_3.setGoalPosition(11, 2048); // Init Positions for DXL 11 and 12
dxl_3.setGoalPosition(12, 2048);
}
void loop() {
// put your main code here, to run repeatedly:
RcvData = 0;
if (Controller.available())
{
RcvData = Controller.readData();
}
if(RcvData == (RC100_BTN_U + RC100_BTN_1)) {
id = 11;
newGoalPosition = dxl_3.readControlTableItem(PRESENT_POSITION,id,time_out) + 50;
if (newGoalPosition <= 4095){
dxl_3.setGoalPosition(id, newGoalPosition);
delay(250);
}
else {
newGoalPosition = 4095;
}
}
if(RcvData == (RC100_BTN_D + RC100_BTN_1)) {
id = 11;
newGoalPosition = dxl_3.readControlTableItem(PRESENT_POSITION,id,time_out) - 50;
if (newGoalPosition >= 0){
dxl_3.setGoalPosition(id, newGoalPosition);
delay(250);
}
else {
newGoalPosition = 0;
}
}
I wrote the code as plainly as possible, so that you can adapt it in any way you want to.
Good luck on your project.