So next, I need to find out how to access all 18 of them as with the dynamixel_workbench or so. In fact, I was hoping that this one would work: GitHub - dynamixel-community/dynamixel_hardware: ros2_control packages for ROBOTIS Dynamixel but unfortunately, after I resolved all the issues in .urdf for the 18 AX-12A detection, it would still fail with the getSyncRead/Write() which are for DXL Protocol 2.0 and I think that it’s because it would still use the workbench library below and it supports only 2.0 protocol. Therefore, I can’t use that again! Thanks!
Great it looks like you are making progress for ROS 2 and AX12.
According to the Robotis example codes for Protocol 1.0, you should be able to do sync_write and bulk_read for MX servos. Have you checked them out and tried to adapt them to protocol 1 and AX12?
Goal Position for AX-12A can only be between 0 and 1023 physically on a span of 300 degrees not 360 degrees like for XL series
Also I saw this on the Robotis e-manual for DXL SDK

No GroupSyncRead for Protocol 1.0 in Python.
But for C++ GroupSyncRead
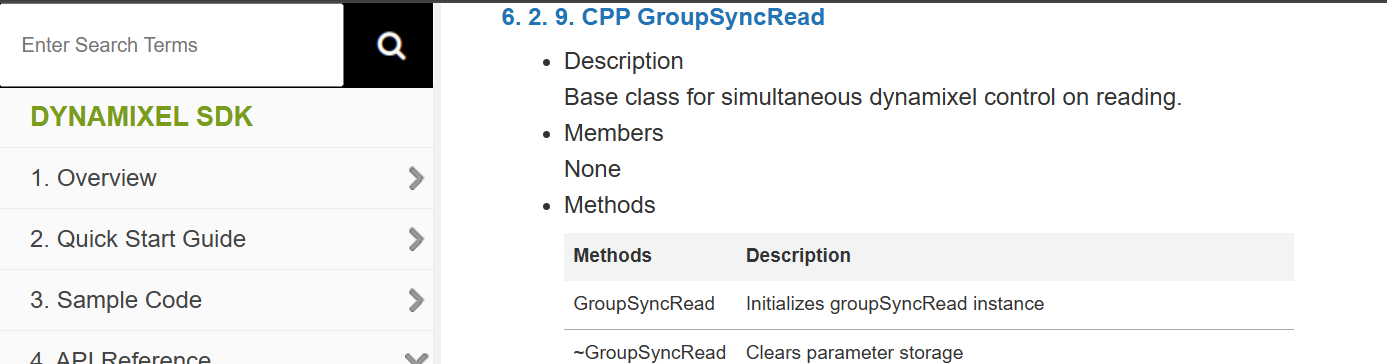
There is no such warning for Protocol 1.0? Do you have to stay with Python?
Thanks for the info again, @roboteer! I did go back to modify the dynamic_hardware package and avoided using all the SyncRead/Write APIs there, so now I can control the arms like this at least:
I still have some issues for all 18 controls and so I will try the two legs tomorrow before trying all 18 again then…the update rate has to be very slow. I set it to 10 now but still seeing all the overrun warning messages. Thanks!
It is time to use Compliance Settings to smooth out the motions
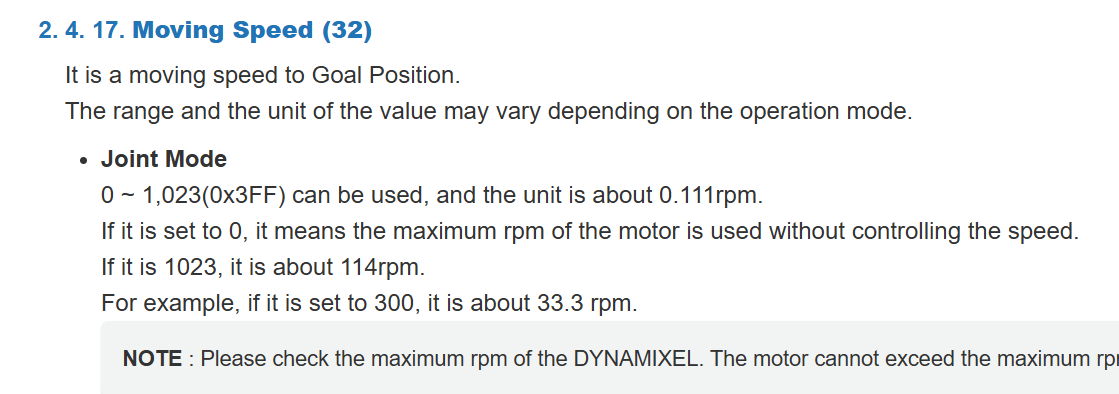
and Moving Speed
Also have you taken care of the USB Latency Timer issue? Change from 16 ms to 1 ms?
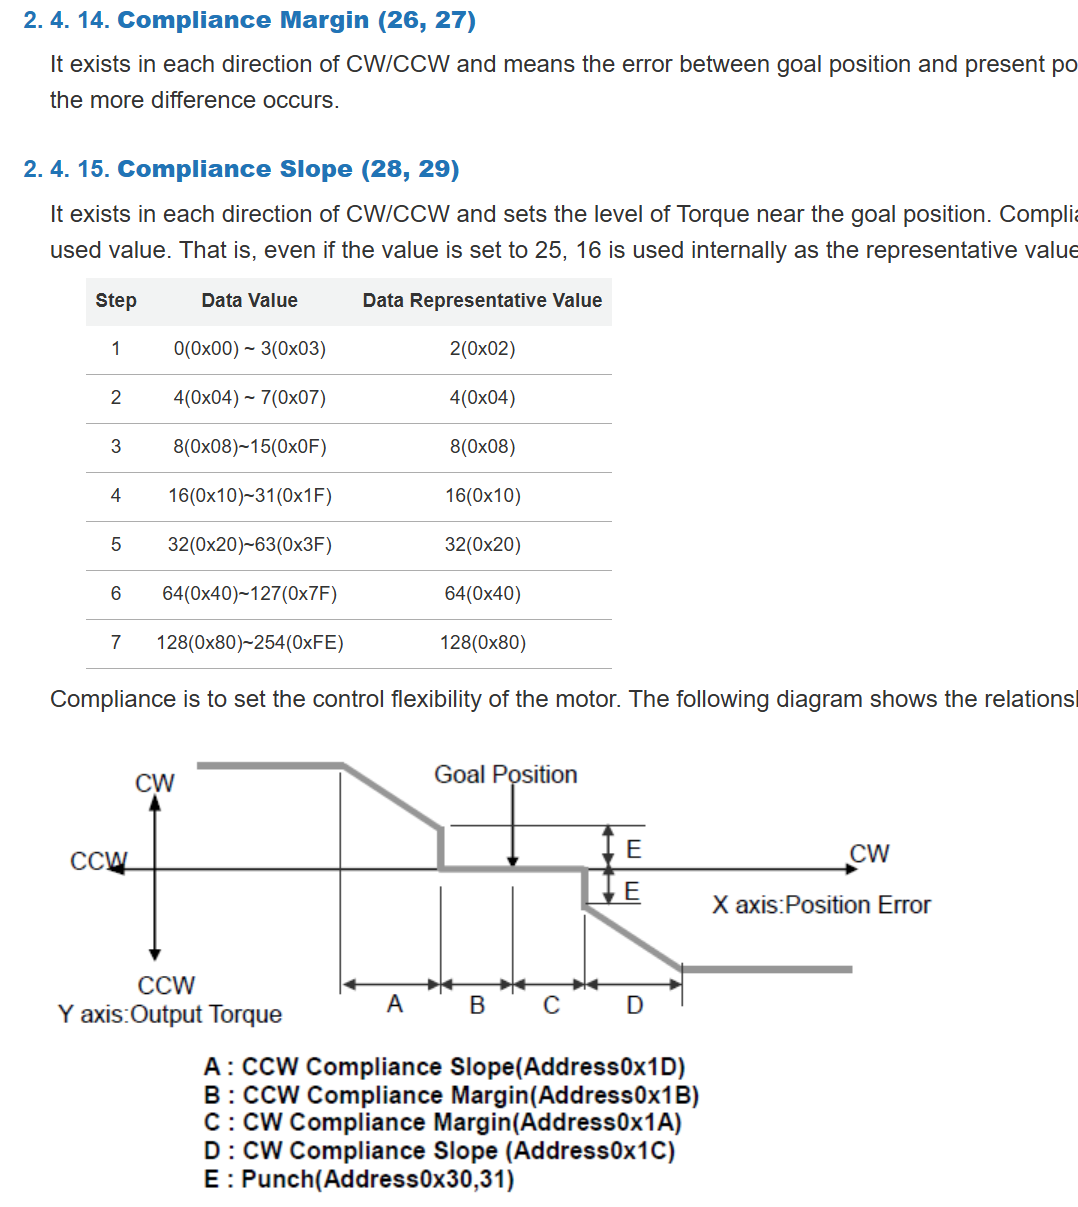
Thanks again @roboteer! I was able to control all 18 AX-12A earlier but I always saw overload error msgs either for joint 7 or joint 8 but it seems ok if i just control either the 2 arms or the 2 legs before?! Therefore, I am still trying to look into how to try the point you mentioned. I just realized that I would have to modify the dynamixel_hardware package again as I can’t take over the USB port being used and it seems that the USB latency timer has to be set even before the dynamixel_hardware::init and so it seems a bit tricky for me (but I read somewhere saying that this is optional for linux?!) On the other hand, I am curious on how to set the values of the compliances for all the 18 AX-12A with the same values? Or they should be of different values?! I’m planning to try these for all first: ADDR_CW_MARGIN = 26
ADDR_CCW_MARGIN = 27
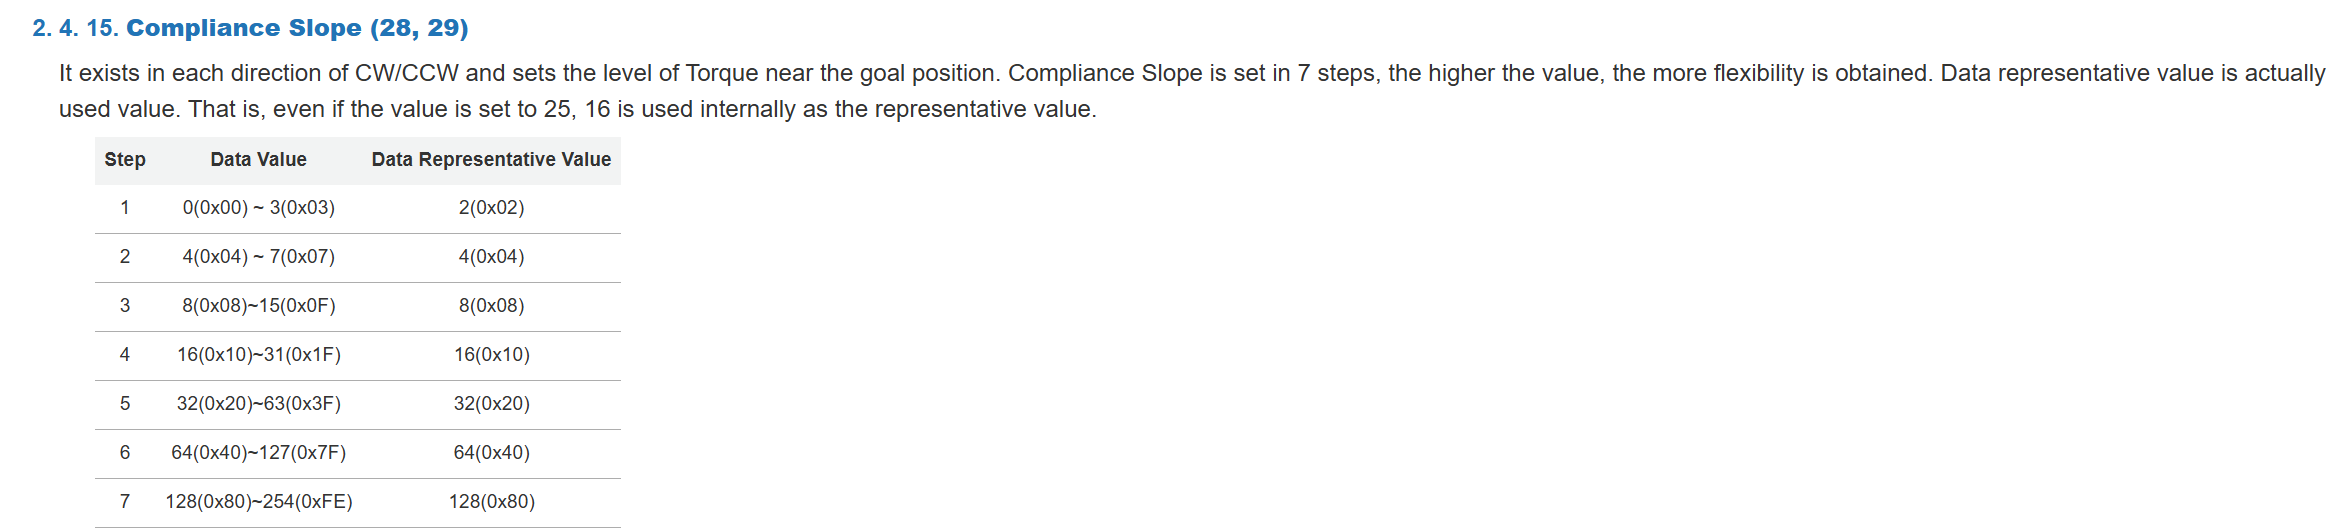
ADDR_CW_SLOPE = 28
ADDR_CCW_SLOPE = 29
CW_MARGIN = 1 # Minimum, typically 1-3
CCW_MARGIN = 1
CW_SLOPE = 32 # 1-254, higher = stiffer
CCW_SLOPE = 32 Thanks!
It would be easier to adjust the Compliances Parameters at the Manager tool level or DXL Wizard level INTERACTIVELY so that you can judge their effects. Then you can decide.
If you want the servos to stop at where you program it to stop, MARGIN = 1, although the AX-12A has lots of gear backlash to guarantee that setting in “real life”.
You already misunderstood the physical meaning of SLOPE, a larger value makes the joint more flexible, not stiffer. The unit for Slope is in Actuator Raw Rotational Position like for the Goal Position [0-1023].
One way to think of SLOPE and using the analogy of stopping a car when you see a red light. The bigger the SLOPE means you start applying the brakes a longer distance away from the red light. While a smaller SLOPE means that you like to apply the brakes only when you get real close to the red light. Which procedure do you think will give your car (and your servo) a smoother stop (i.e. less vibrations to the whole car/robot) when your car/robot reaches its Goal Position?
As you are a newbie at this, try to control motion smoothness by reducing the Moving Speed first (unless the robot is then going too slow) and just use the default values for Margin, Slope and Punch.
Overload errors are of a different issue, it may mean that your servos are getting old, so more friction somewhere - you can mitigate with slower Moving Speed. How old is your Premium? Sometimes I had to take apart the AX-12A to clean them up and use new grease for the gear train. But too late now for that procedure!
Thanks again, @roboteer!! Yes, I bought this robot during pandemic back around the end of 2020. I assembled it but didn’t have much time to learn the details since then, so all my 3 old LiPo batteries were swollen when I took it out for this final project and so I dared not to buy that many but 1 new battery this time! I tried to change the moving speed to much slower value 200 but I still saw the random issue with joint #8 or joint #7 overloaded. Therefore, I tried again with legs only and it’s again ok and so I modified the python script to be closer style and set smaller pose angles and so I don’t see the overloaded issue now. Hope that it will be ok then as it’s not easy to disassemble and lubricate the motors inside now as you said! On the other hand, I looked back to the RoboPlus Motion tool and find the “Joint Softness” in the GUI and so I wonder if it’s same as what you explained about the SLOPE please?! If so, that means, in the default premium .mtn file, they’re actually setting it to 5 in all the different types of action, right?! I now want to try to mimick a few of these motions with the python script instead to see if it would work then…Thanks!
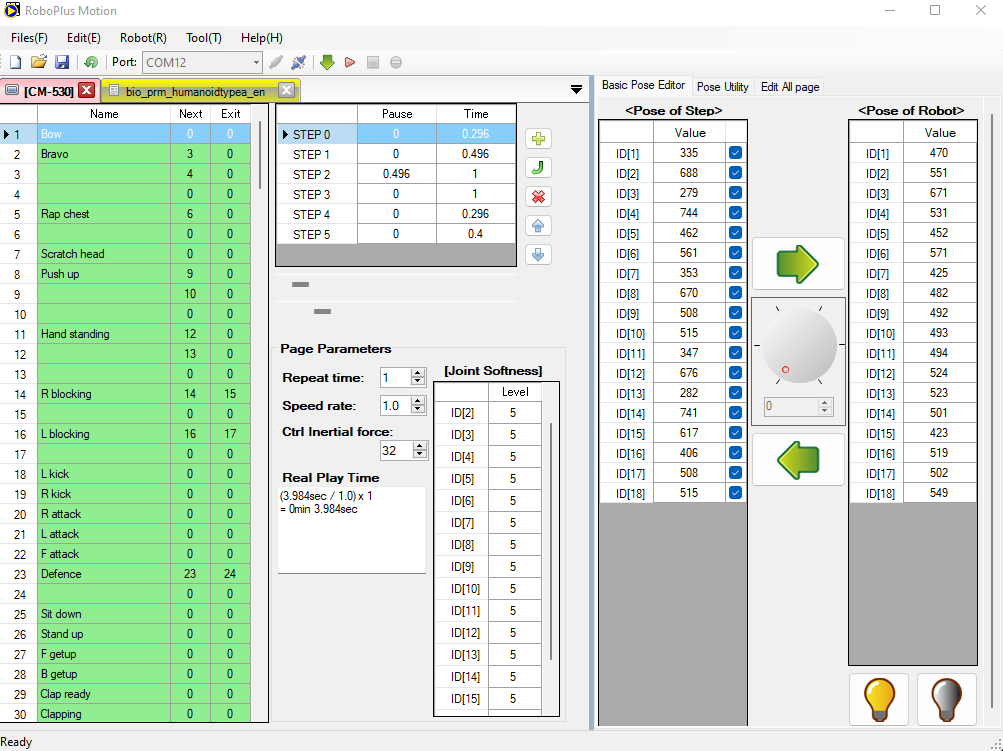
I am including again the previous screen capture but bigger
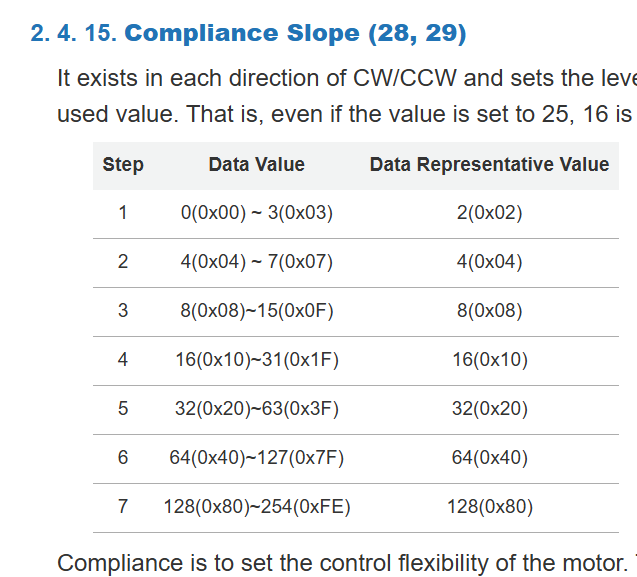
You can see that Softness 5 is the same as Slope at 32.
You do not need to go all the way back to MOTION V.1 to use the Premium, you can use the current TASK V.3 (i.e. MOTION V.3 which has a nicer 3D simulation model of the Premium) to look at how Motion Constructs are made also.
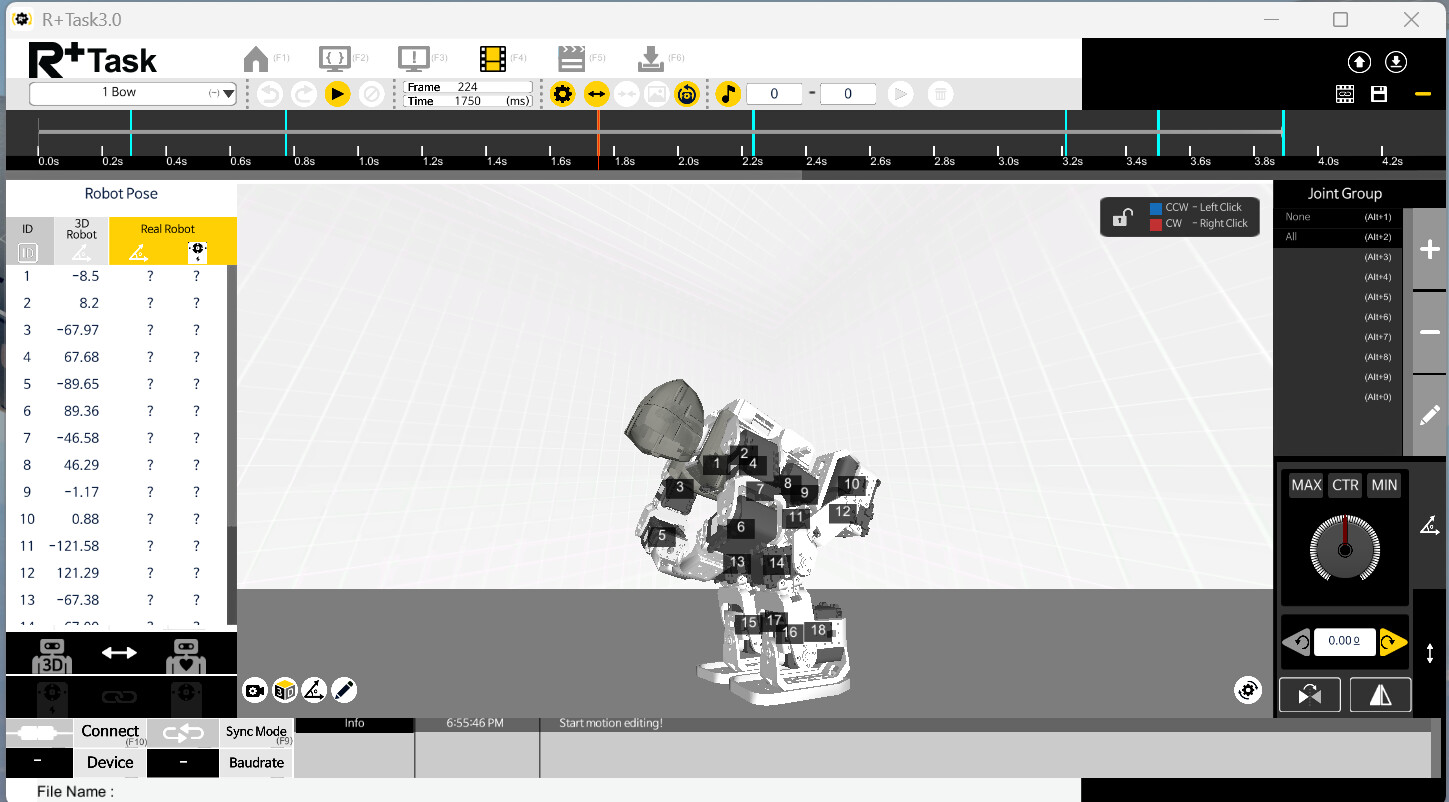
TASK V.3 can be downloaded from here.
https://en.robotis.com/service/downloadpage.php?ca_id=10
User Manual is here
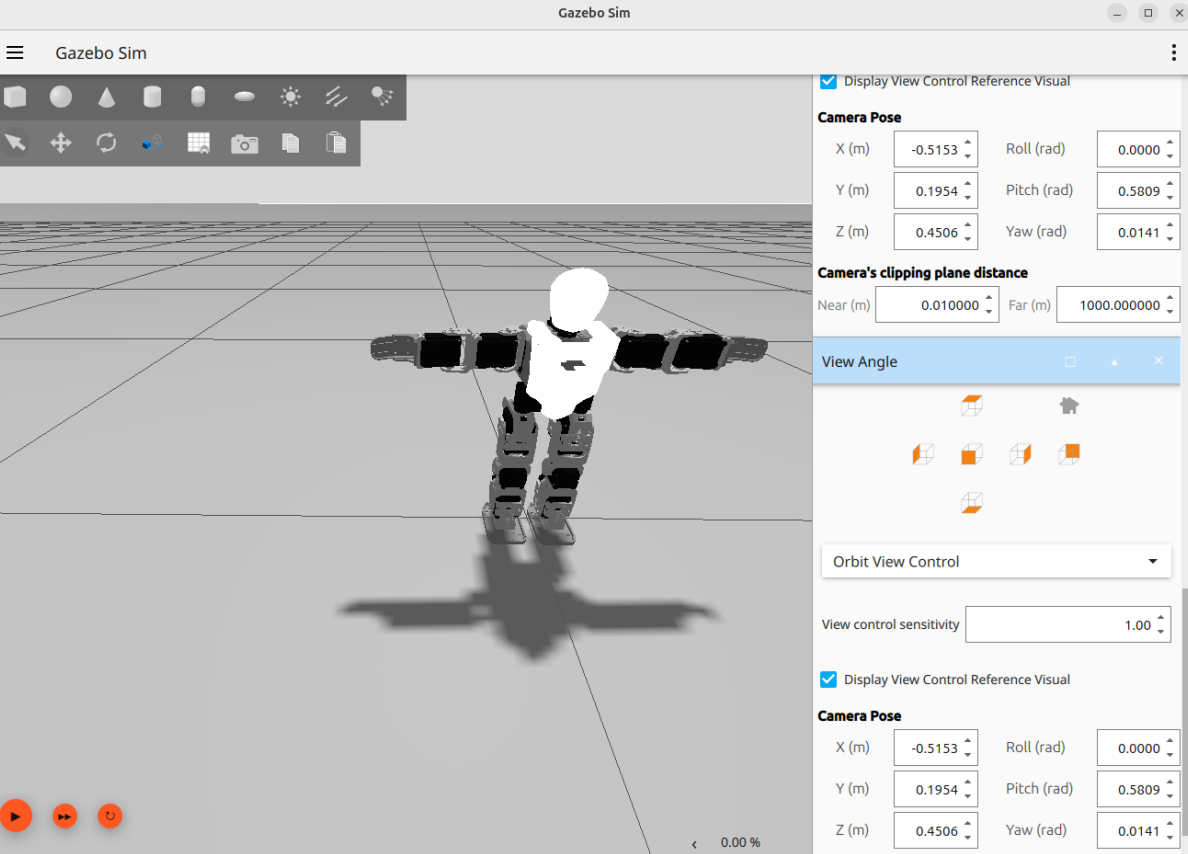
Thanks again @roboteer! I will look into that R+ Task tomorrow then. Today I have been struggling with the Gazebo Harmonic and it is very difficult to use it when compared to the old Gazebo Classic. It is too heavy and I can’t even change the color setting after many trials.
On the other hand, it seems easier for me to work with rviz2 too still.
I would like to ask if the MoveIt2 is not useful in planning for the robot movement because it is not supposed to work for so many joints please?! Thanks!
Unfortunately, I have no experience in using those software tools.
I see, thanks! The Gazebo Harmonic is really a headache to me now, so I may just try a bit more the rviz2 tomorrow then.
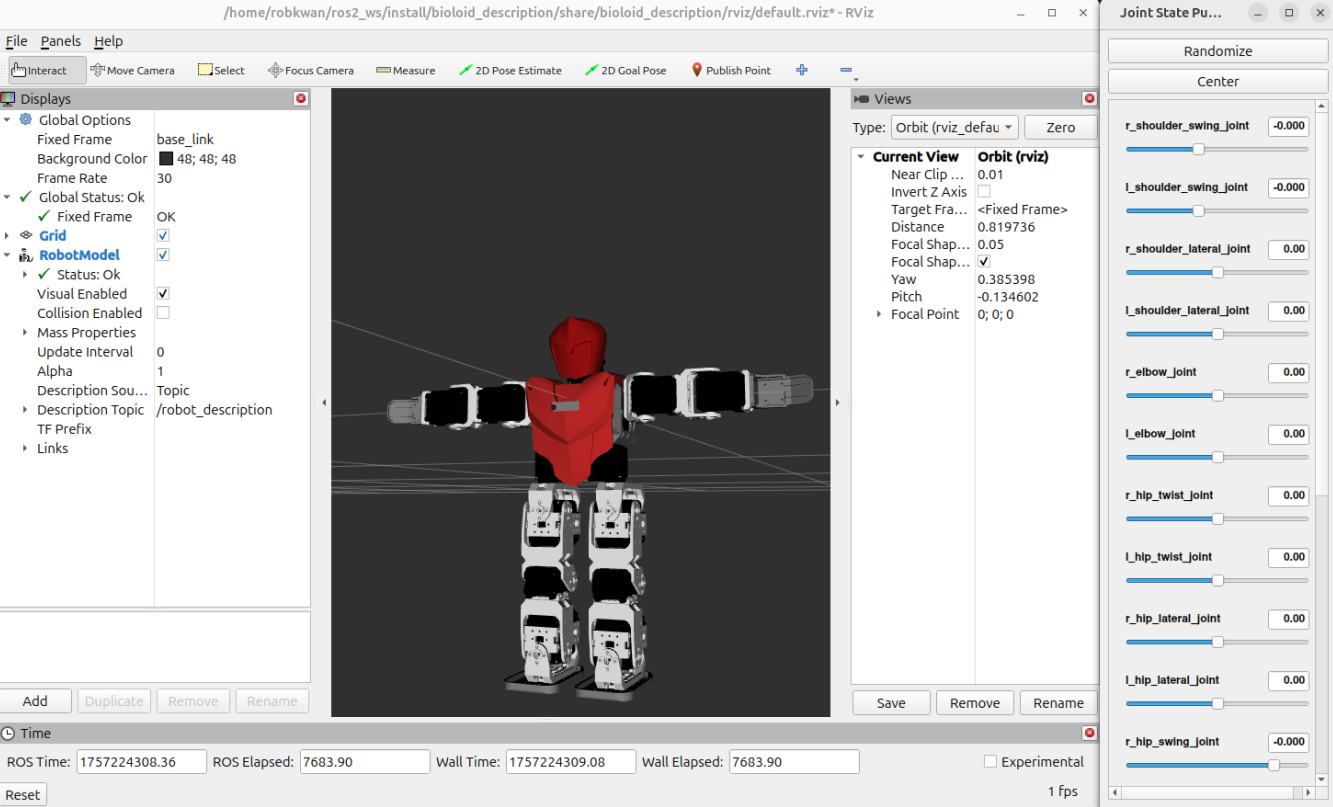
Hello @roboteer! I finally made some progress on my Gazebo simulation like this:-
I have not used Gazebo yet so I have no idea. To make my Premium walk I only modified the existing Motion examples from Robotis for my needs (via the Motion 3 tool).
I see, thanks! No problem. When I used the ROS1 Melodic Gazebo, it’s shaky to move but still ok. This newer ROS2 Jazzy Gazebo just made it so complicated…!
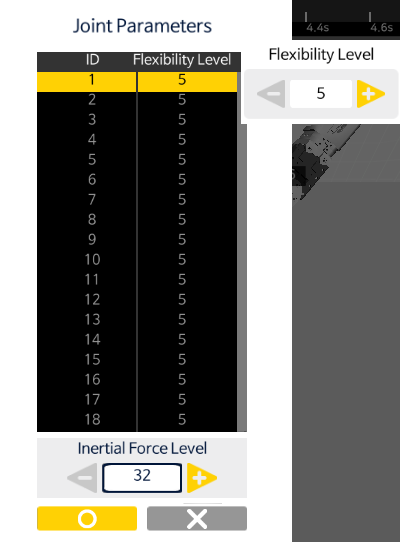
Hello! I would like to ask if anyone can tell me which register would this Inertial Force Level’s value in R+task be written to please. I thought that it would be related to the Torque Limit (addr: 34) of AX-12A for the Bioloid Premium but it turned out if I set it there with the value times 8, the robot won’t move then as the torque limit will be probably too small?! Thanks.
I reread my notes from back in 2014-2016 when I wrote my first Bioloid book (which was a long time ago), and I kind of recall that “Inertial Force Control” was a parameter that you can set from inside Motion 1 tool, but this parameter was never documented in the “public” version of the Control Table of the AX-12 which is Protocol 1 (the AX-12 itself was designed back in 2002-2003). It is only when we use Protocol 2 actuators such as XL-430 that we “see” a “similar” feature/parameter re-appearing as “Profile Acceleration” with its own Address. And “Slopes” are now related to “Profile Velocity” in Protocol 2. But “Punch” is no longer available in Protocol 2!
There is a little additional info in the documentation for MOTION V. 1 here:
but nothing about the actual register address.
Remember that the AX-12’s Firmware is proprietary and ROBOTIS decides on what to reveal in its public Control Table. You can try to write a private email to @ROBOTISUSA to see if they can forward your inquiry back to ROBOTIS HQ to see if there is someone at HQ who can help you with this issue.
Thank you very much @roboteer! When I searched online, it did mention about the “Profile Acceleration” but not exists in AX-12A as you said! I will try to send the email later then. Thanks!