With the robot Commando with Engineer Kit 1 + Kit 2, we are able to use the default line detection function with Raspi Zero W + Camera by setting the camera mode to 5 and set the sub mode to the default color (such as Red color, etc). However, how to detect black color?
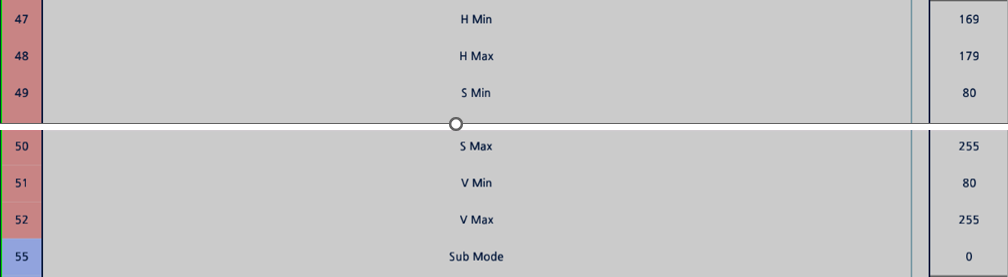
We found that there are H, S, V setting, however when we set the value, the line detection is still detecting the color in sub mode. How to let the detection is detecting the colour with these H, S, V setting?
Very good question! So far, ROBOTIS has not released the detailed control table for the ROBOTIS’s RPi0W+Pi Camera, so I am not sure myself how the min-max values of HSV relate to the SubMode (Addr. 55), when the Mode (Addr. 11) is set Color Detection (Mode=1). Furthermore, I do not have the ROBOTIS Pi-Camera handy to test right now, so below are just my “best guesses” and they are not guaranteed to work correctly, so you can try them and report back on this post and we’ll see.
First, what kind of min-max values for the HSV variables did you use? Did MANAGER tool let you save them in memory?
In the HSV Color Space (which is 3-dimensional), the Black-to-White objects are located along on the Central Vertical Axis (see this Wikipedia article HSL and HSV - Wikipedia). This means that you should try to set the various min-max HSV values as follows:
The Hue range should be set as “wide” as possible H_min = 0 and H_max = 255.
The Saturation range should be set “narrow” to correspond to the area along the main central axis, for example: S_min = 0 and S_max = 25 (as an example) - most likely you will have to tweak the value for S_max.
The Value range should be set to find YOUR Black/Gray Line - per se, so for example V_min = 0 and V_max = 50. Again V_max needs to be adjusted to fit your situation, and possibly V_min too.
Then you still need to set the Sub-Mode (Addr. 55) to some kind of value! And here is my “wild guess”, choose “White”, i.e. “7” for “Sub-Mode”. If this scheme works, I’ll put this solution in the second edition of my “Engineer” books.
Another “lateral thinking” approach is also possible: why don’t you have a black background and use “white” tape to make the track for the robot to follow?
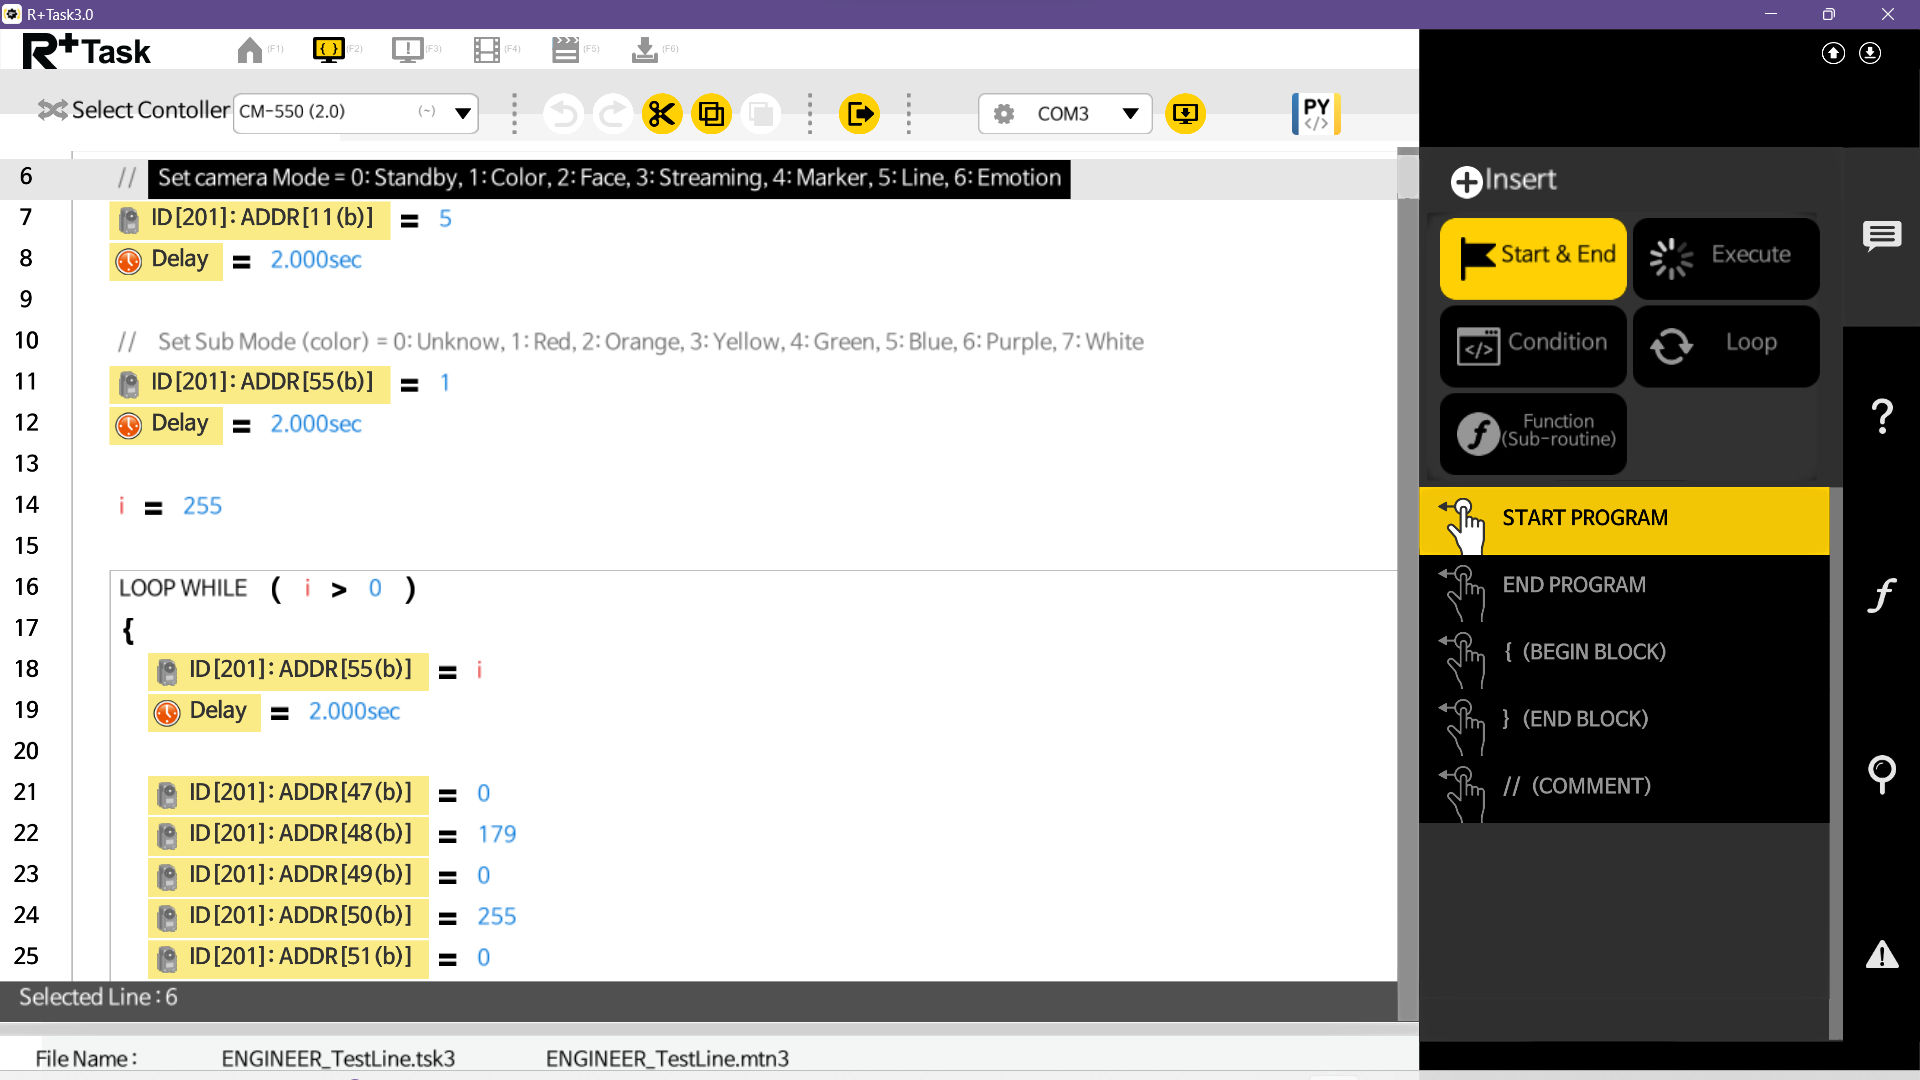
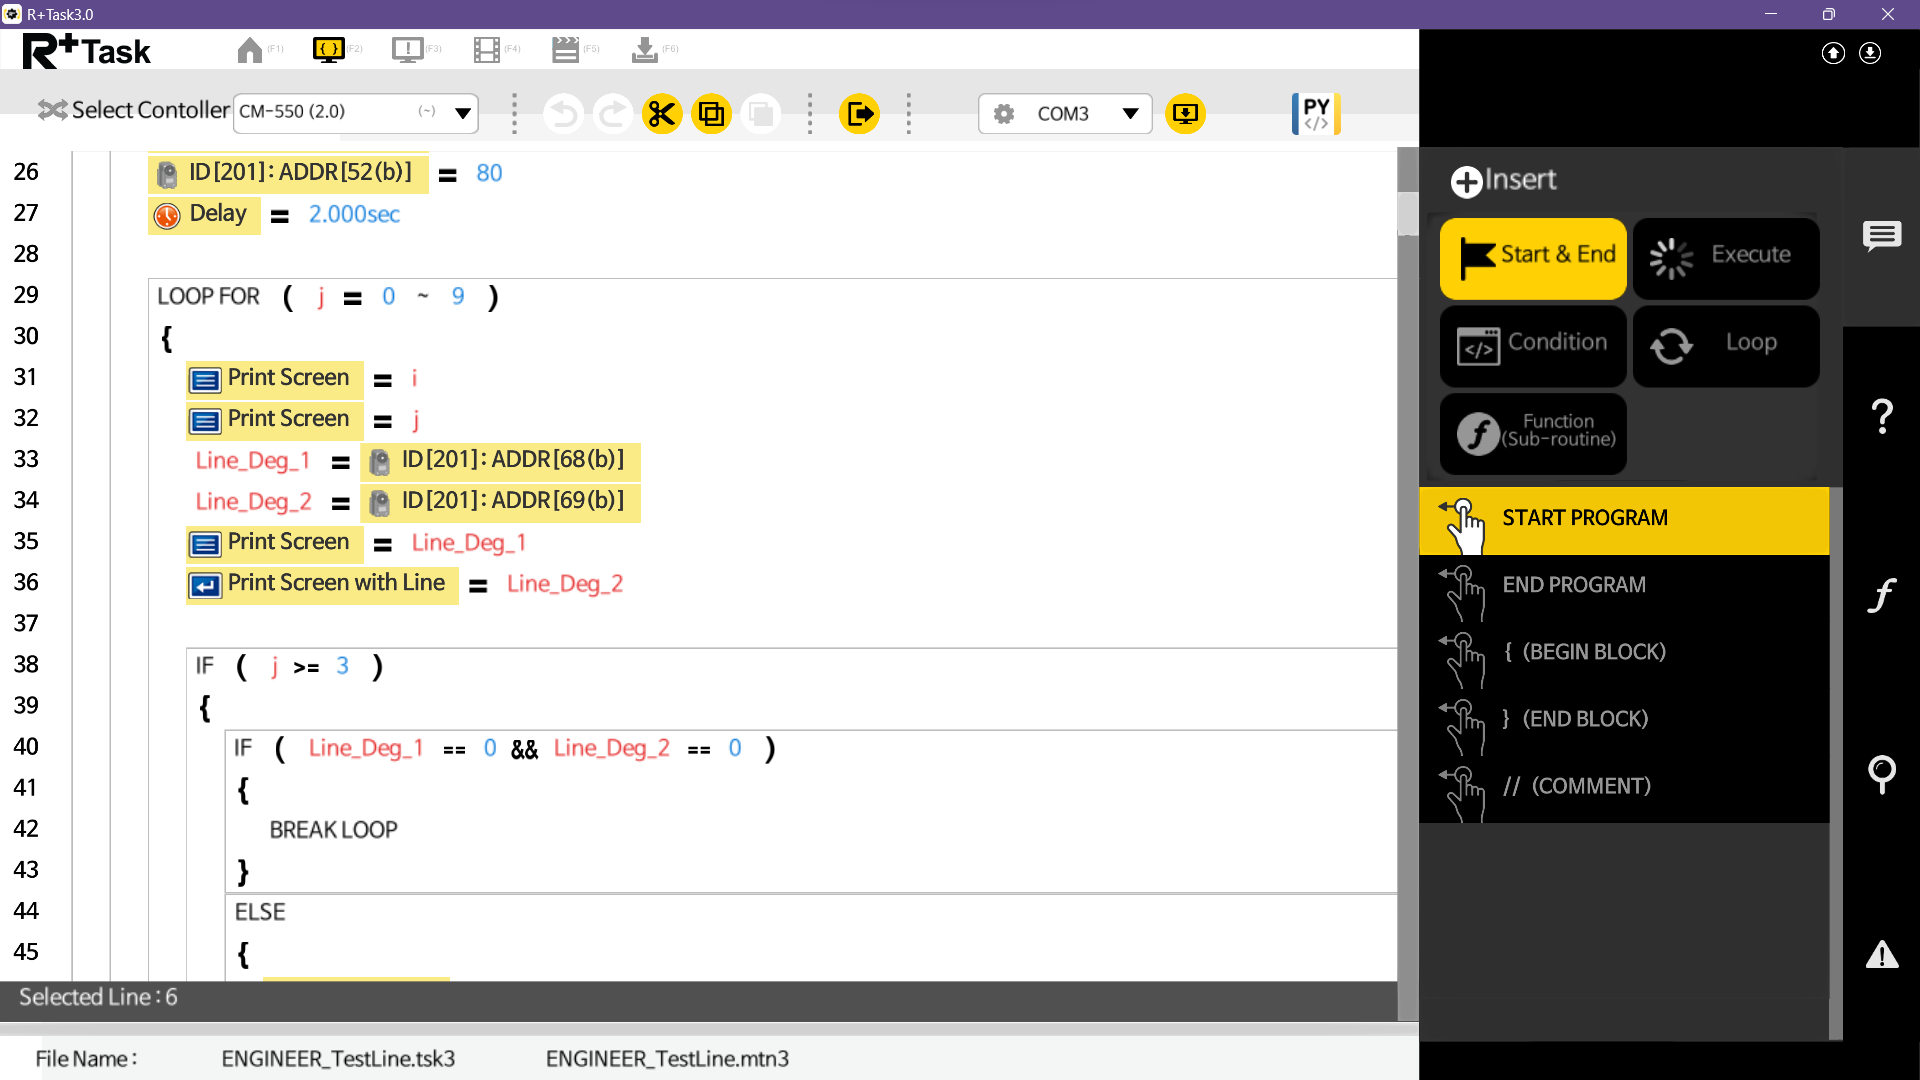
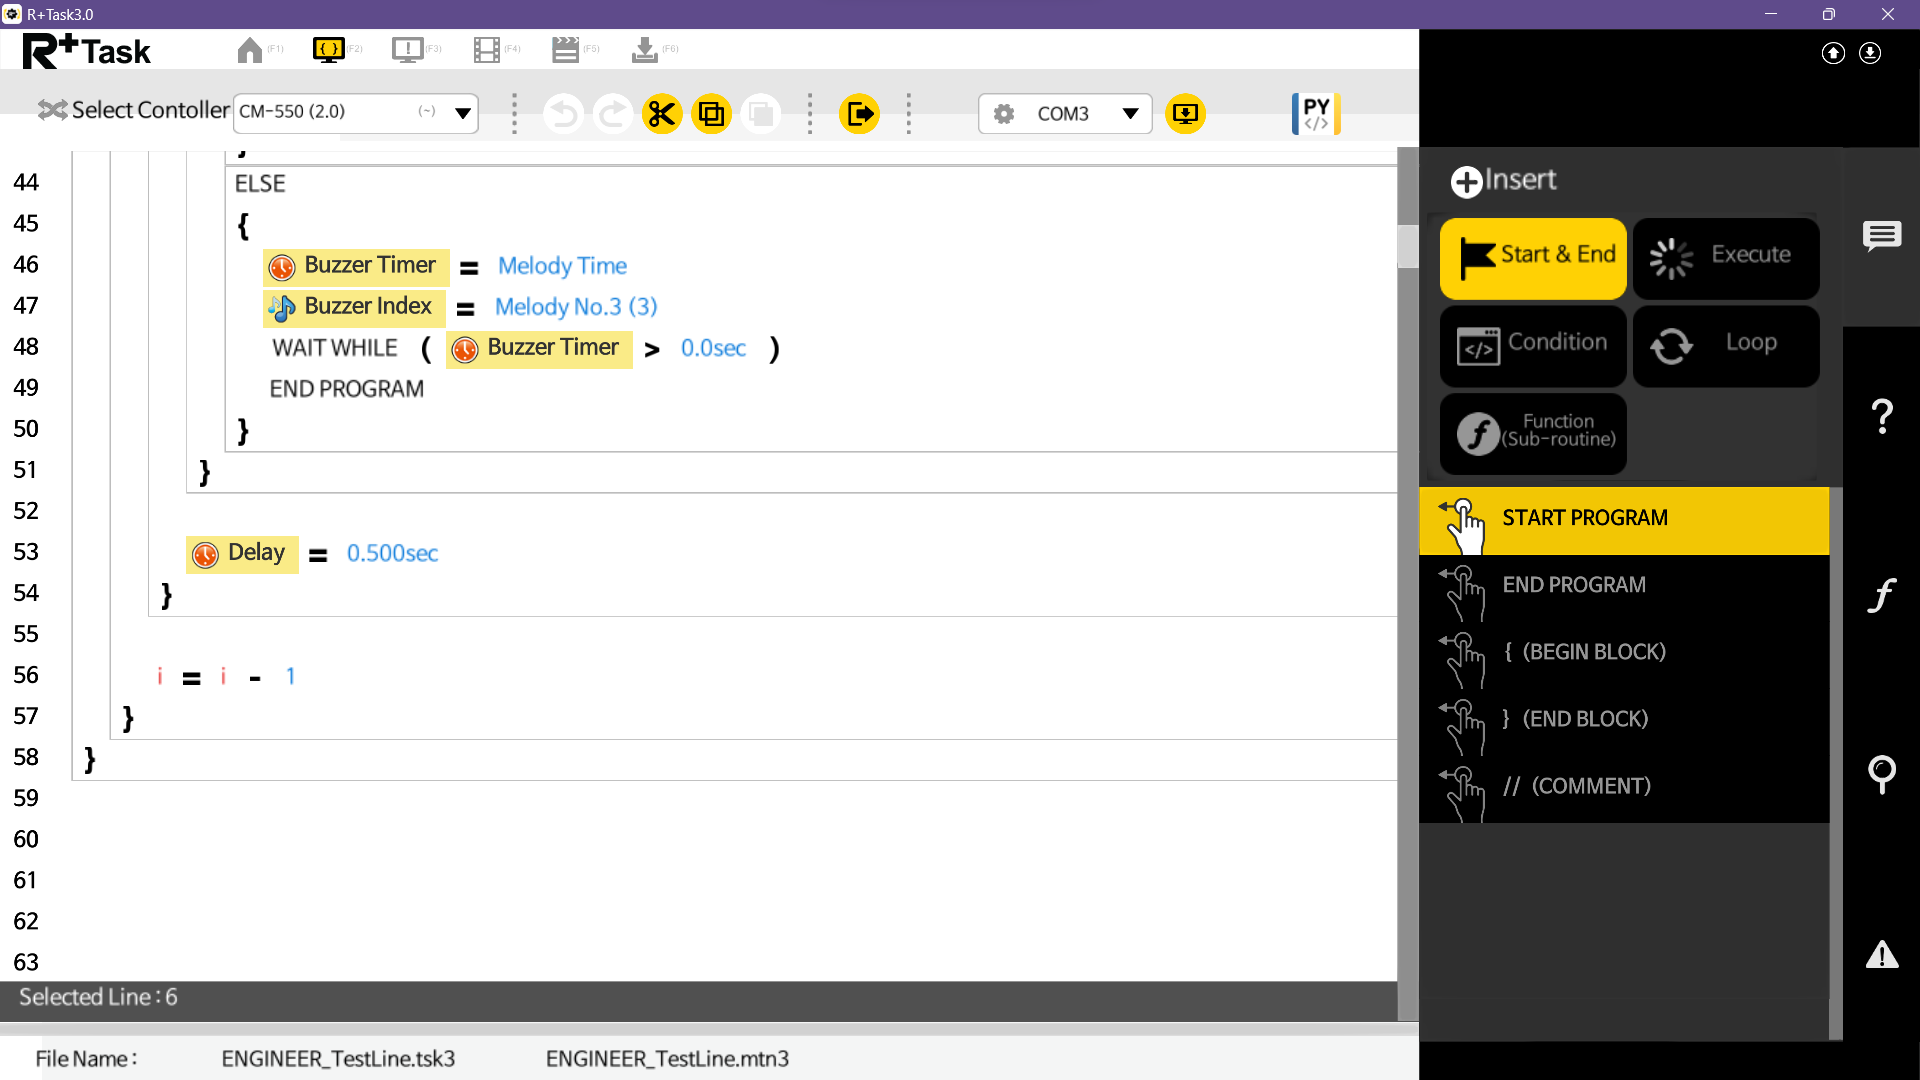
MANAGER tool does not let me edit the HSV value, but we can load the value with codes in R+Task3.0. After that I checked in the R+Manager, all the value is written. However the camera is still detecting the colour set in the Sub Mode!
I run a task code to test on changing the Sub Mode from (255 ~ 0), like this:
It looks like if you stay with this setup: using the RPi0+Pi Camera as a DXL 201 and as designed by ROBOTIS, it does not give you enough flexibility to track a Black Line.
From now on, you have several options depending on your current hardware/software knowledge:
If you only know how to program in TASK and the CM-550, then you need to look at using the IR Sensors (IRSS-10) and use the 5-PIN connectors on the CM-550. You should be able to track a black line fairly well using 2 IRSS-10s.
Then you can use the RPi camera to detect other objects that it is designed to detect using ROBOTIS firmware.
If you are knowledgeable in Python or C/C++, then you can install RPi OS on the existing RPi0-W and the Pi Camera. Then you can use my Engineer Book (which uses an RPi4B though, and OpenCV).
In the case that you know Arduino, you can use the OpenRB-150 and the Husky Lens
Gravity camera which is very popular in Asia, then you can use my Arduino book instead.
I try to stay with this setup: “using the RPi0+Pi Camera as a DXL 201 and as designed by ROBOTIS", because it is easier for the students to code in Task and handle the hardware.
I got your book, so I will study and consider your suggested setup. Thanks again. ^^
The camera can maintain only one mode at any one time. But in theory you can switch mode within the same program. And it takes a long time to switch mode back and forth.
If you use a car bot I would stop the car first before doing video streaming for a short time then switch to color tracking mode before letting the carbot move again also for a short time. Then your program can repeat this sequence at the next iteration So the overall performance will not be very good, unfortunately!
To do all that you will need a more powerful setup like with an OpenRB-150 combined with an RPi5 with its own RPi Cam and/or Husky Lens Gravity camera and then you also will need to program in C++ and Python too. And probably two separate cameras too.
Or you can set up two CM-550s with two Pi Zero on the same robot too!! Each CM-550 can do its own job while communicating to each other via RC-100 packets and BLE, or even wired serial comm through the 4 pins UART ports.