안녕하세요,
아두이노 IDE에서 openCM9.04보드로 모터를 제어하려던 중에 문제가 발생했습니다.
- 운영체제: Windows 10 64bit
- 보드: ROBOTIS OpenCM9.04
- 모터: Dynamixel XL-320 (1개, 3.7V 리튬이온 배터리 2셀로 전원 공급)
- IDE: Arduino IDE (보드 패키지 설치 완료)
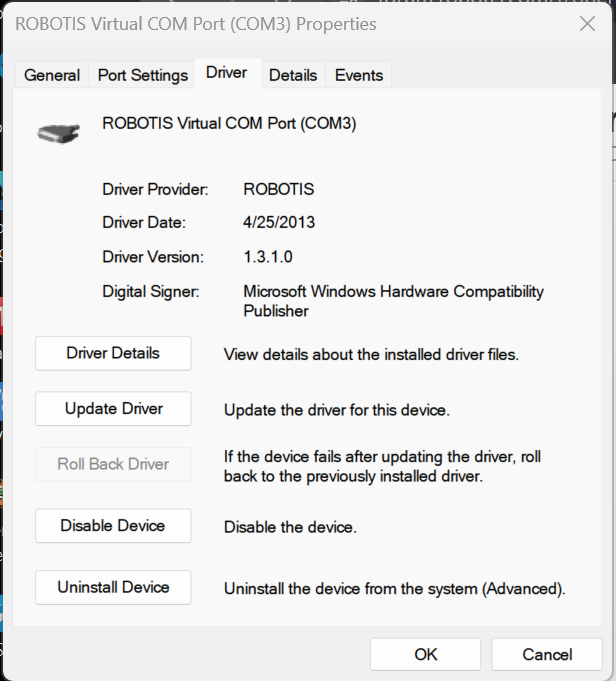
로보티즈 메뉴얼 대로 USB 드라이버를 설치 하는 과정 그대로 드라이버 설치와 수동 업데이트를 수행했음에도 포트의 드라이버가 바뀌지 않습니다. (계속 usbser.sys)
이 상태로 아두이노 IDE를 사용해 보았는데,
- LED_BUILTI로 LED 깜박이기 코드는 작동 O
- Dynamixel2Arduino.h 를 사용하는 코드는 작동 X
노트북 기기 문제인가 싶어, 다른 노트북 2대로 추가 시도해 보았고,
openCM보드 및 케이블을 모두 변경해 보았으나, 모두 동일한 문제가 발생하였습니다.
[문의사항]
- 해당 드라이버(ROBOTIS Virtual COM Port v1.3.1.0)가 Windows 10에서도 완전 호환되나요?
- 해당 문제의 원인과 이를 해결할 수 있는 방법이 있을까요?
- windows 10 환경에서 모터 XL-320을 제어하려면 보통 어떤 방법을 사용하나요? (U2D2, openCM, 아두이노 쉴드 등)
답변주시면 감사하겠습니다…!
I use Windows 11 and it used the same driver for the Virtual COM as you have
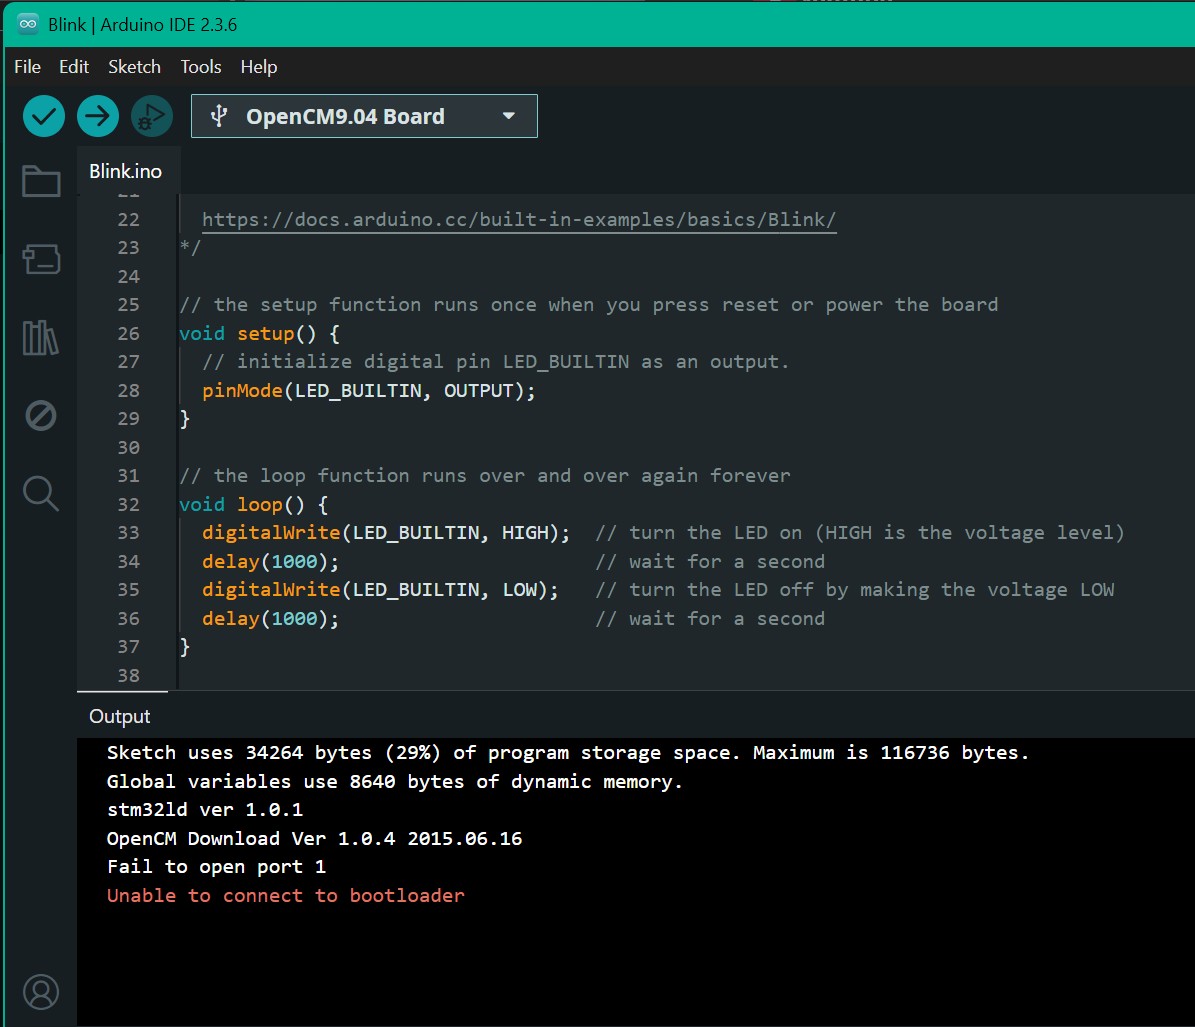
I used ARDUINO IDE 2.3.6 with a OpenCM-904 to test out Blink.ino and it did not upload OK the first time (probably because it still has the ROBOTIS firmware)
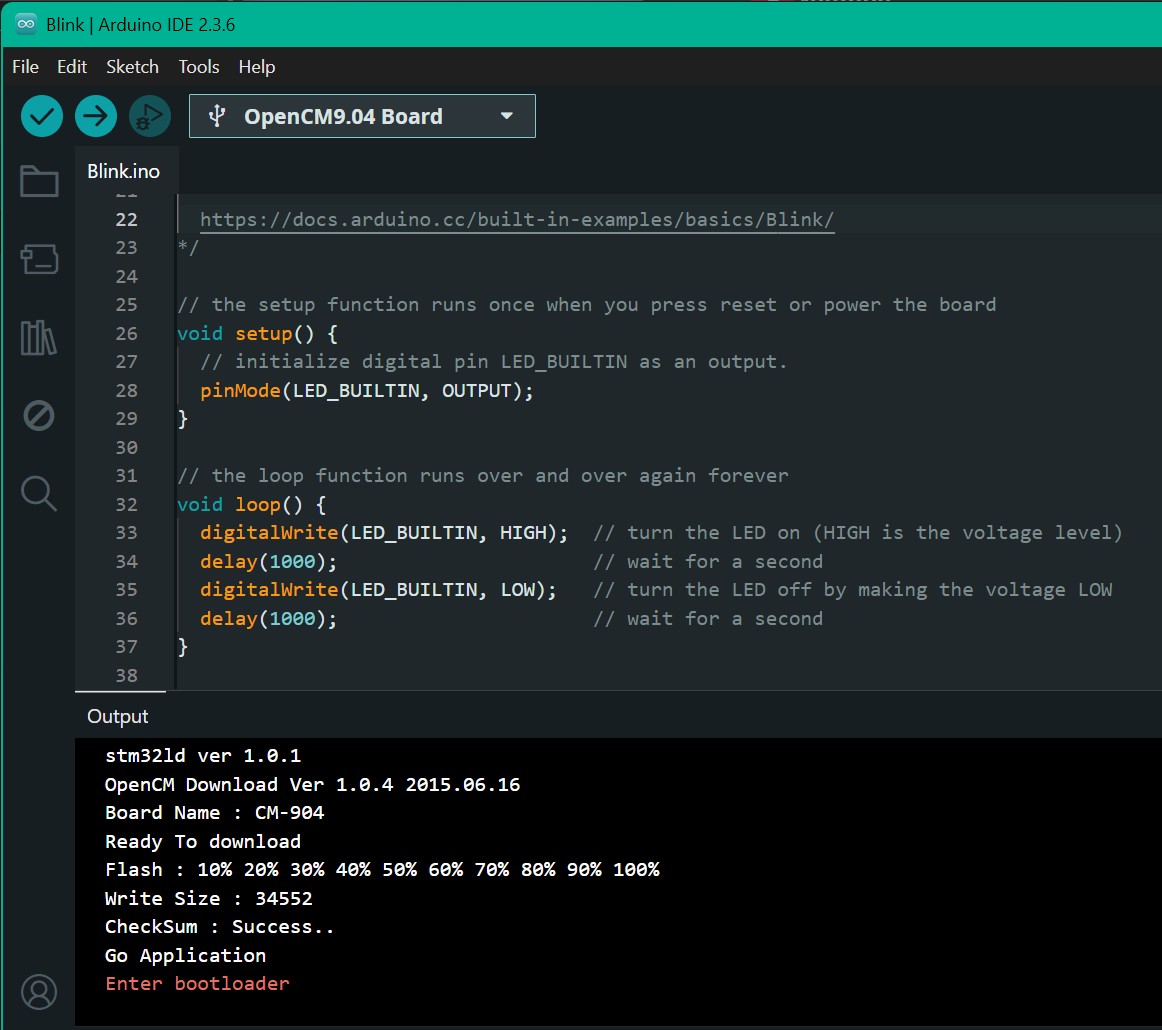
But I retry it the second time, and everything works OK now.
Maybe you miss some step(s) in installing Arduino with the OpenCM-904? As shown in the e-manual at this link?
Below is my version of position_node.ino for Servo 1
#include <Dynamixel2Arduino.h>

// #define DXL_SERIAL   Serial3 //OpenCM9.04 DXL Serial Port (Serial1 for DXL port on OpenCM 9.04 board, Serial3 on 485-EXP)
#define DXL_SERIAL   Serial1 //OpenRB-150 & 904
#define DEBUG_SERIAL Serial
const int DXL_DIR_PIN = 28; //= -1 for OpenRB-150  - for OpenCM9.04 DIR PIN. (28 for DXL port on the OpenCM 9.04 board, 22 for 485-EXP)

const uint8_t DXL_ID = 1;
const float DXL_PROTOCOL_VERSION = 2.0;  // 1.0 for AX-12; 2.0 for X series

Dynamixel2Arduino dxl(DXL_SERIAL, DXL_DIR_PIN);

//This namespace is required to use Control table item names
using namespace ControlTableItem;

void setup() {
  // put your setup code here, to run once:

  // Use UART port of DYNAMIXEL Shield to debug.
  DEBUG_SERIAL.begin(115200);  // USB port - NOT to be confused with DXL Port

  // Set DXL Port baudrate - This has to match with "new" DYNAMIXEL baudrate.
  dxl.begin(1000000);  // set DXL Port to 1000000
  dxl.torqueOff(DXL_ID);
  // Set Port Protocol Version. This has to match with DYNAMIXEL protocol version.
  dxl.setPortProtocolVersion(DXL_PROTOCOL_VERSION);
  dxl.setOperatingMode(DXL_ID, OP_POSITION);
  dxl.torqueOn(DXL_ID);

  // Get DYNAMIXEL information
//  dxl.ping(DXL_ID);

  // Limit the maximum velocity in Position Control Mode. Use 0 for Max speed
  dxl.writeControlTableItem(PROFILE_VELOCITY, DXL_ID, 70);
}

void loop() {
  // put your main code here, to run repeatedly:

  // Please refer to e-Manual(http://emanual.robotis.com/docs/en/parts/interface/dynamixel_shield/) for available range of value.
  // Set Goal Position in RAW value
  dxl.setGoalPosition(DXL_ID, 1000);

  int i_present_position = 0;
  float f_present_position = 0.0;

  while (abs(1000 - i_present_position) > 10)
  {
    i_present_position = dxl.getPresentPosition(DXL_ID);
    DEBUG_SERIAL.print("Present_Position(raw) : ");
    DEBUG_SERIAL.println(i_present_position);
  }
  delay(1000);

  // Set Goal Position in DEGREE value
  dxl.setGoalPosition(DXL_ID, 5.7, UNIT_DEGREE);

  while (abs(5.7 - f_present_position) > 2.0)
  {
    f_present_position = dxl.getPresentPosition(DXL_ID, UNIT_DEGREE);
    DEBUG_SERIAL.print("Present_Position(degree) : ");
    DEBUG_SERIAL.println(f_present_position);
  }
  delay(1000);
}
Enclosed is a little video clip to show that this code is working. Can you try this code to see if it is working for you? And post back what you found?
Good Luck
해결했습니다 !
DXL 포트와 DIR 핀 번호를 485 확장보드 번호로 사용했던게 문제 였습니다.
번호를 수정하니 잘 작동되네요.
감사합니다 !
Excellent!
Don’t forget to mark that your issue is resolved.