Edutainment Product
Robotis MINI eng (No Head Servo)
Issue Description
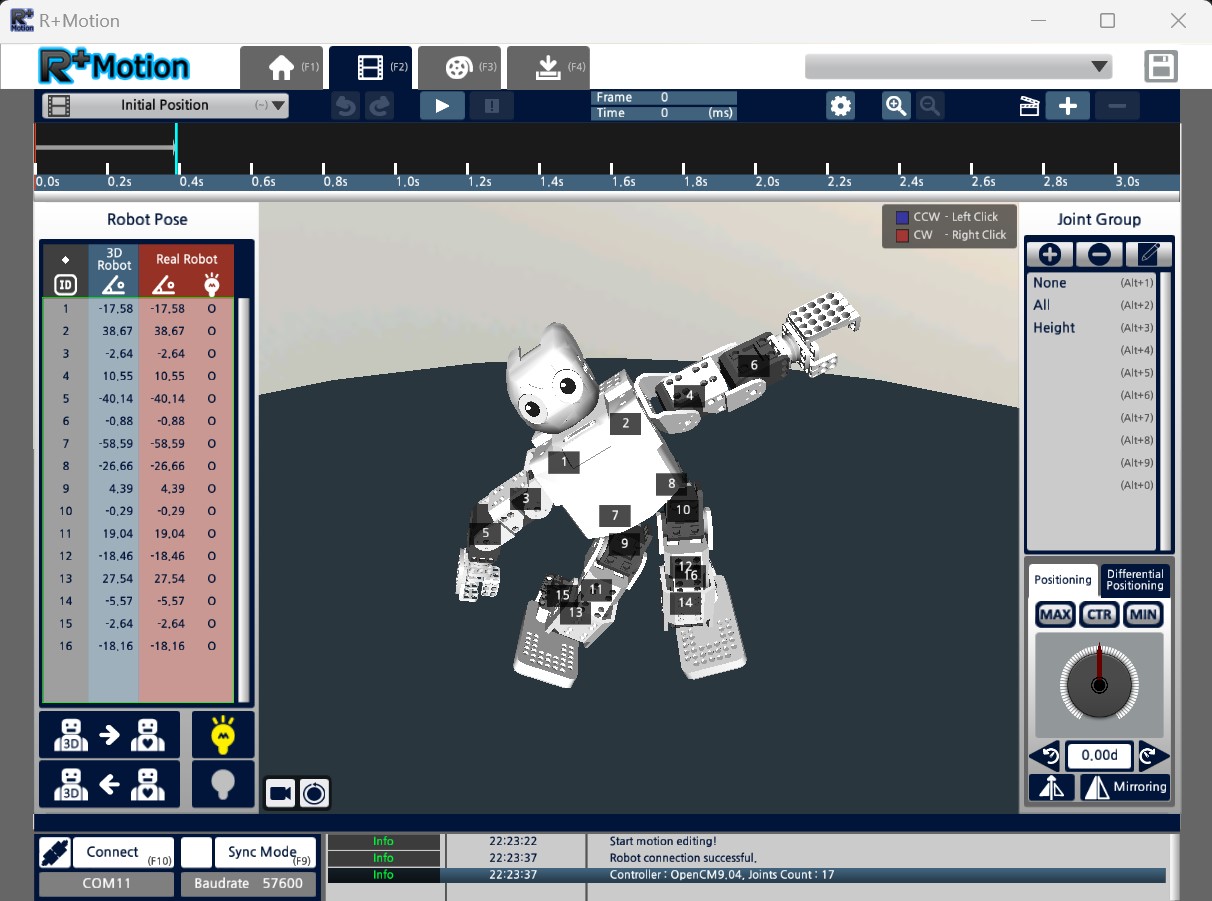
I am able to connect to the robot via bluetooth, and then connect to it via R+Motion, but not sync the position data from R+Motion to the robot. I have tried swapping the bluetooth board and the main board out with no change. I have checked to see if all cables are correctly plugged main board. I tried using the firmware update tool through RoboPlus, but I when I follow the instructions and try to connect to the same port R+Motion uses for this robot it errors out either sayings nothing is connected or to restart the tool.
Additional Information/Attachments

Seen here it does not register any joints.
That is very odd.
I just tried my MINI on MOTION 2 and MOTION 3 (via TASK 3) and they both worked fine. I am using BT-210. Which BT device are you using? BT-210 or BT-410? And are you using a Windows PC? Which OS version?
Have you tried to connect via USB also?
Hello,
The manual specifies BT-210. I am on a windows PC running Win 10 Version 10.0.19045 Build 19045
And I have tried connecting via USB as instructed in the firmware update instructions: ROBOTIS MINI
Were you able to recover the firmware of the OpenCM-904 via USB?
And you have built the complete robot and connect the XL-320s to the OpenCM-904 Controller?
That is when I could not connect to port 22, the port used with R+ Motion. It either said no device was on any port or to restart the software.
I have built the complete robot and connected the servos, I checked to make sure they were connected correctly. Even if they weren’t, would it not just flip which servos respond to which commands? It shouldn’t completely interrupt a sync I would think, but I am new to all of this.
By 22, you meant COM22 right?
You can only use ONE App at a time that uses COM22 (this is a Windows requirement). So either MANAGER only, or RTASK only. Windows won’t let you connect two Apps to the same COM port.
Correct, COM22. I noticed this, so I disconnected R+ Motion and tried with just Task. I am not with the robot at this moment, but I will send a picture hopefully soon with these errors in Task, outlining my process.
For now, you need to concentrate on Recovering the Firmware on the OpenCM-904 ONLY using USB cable first.
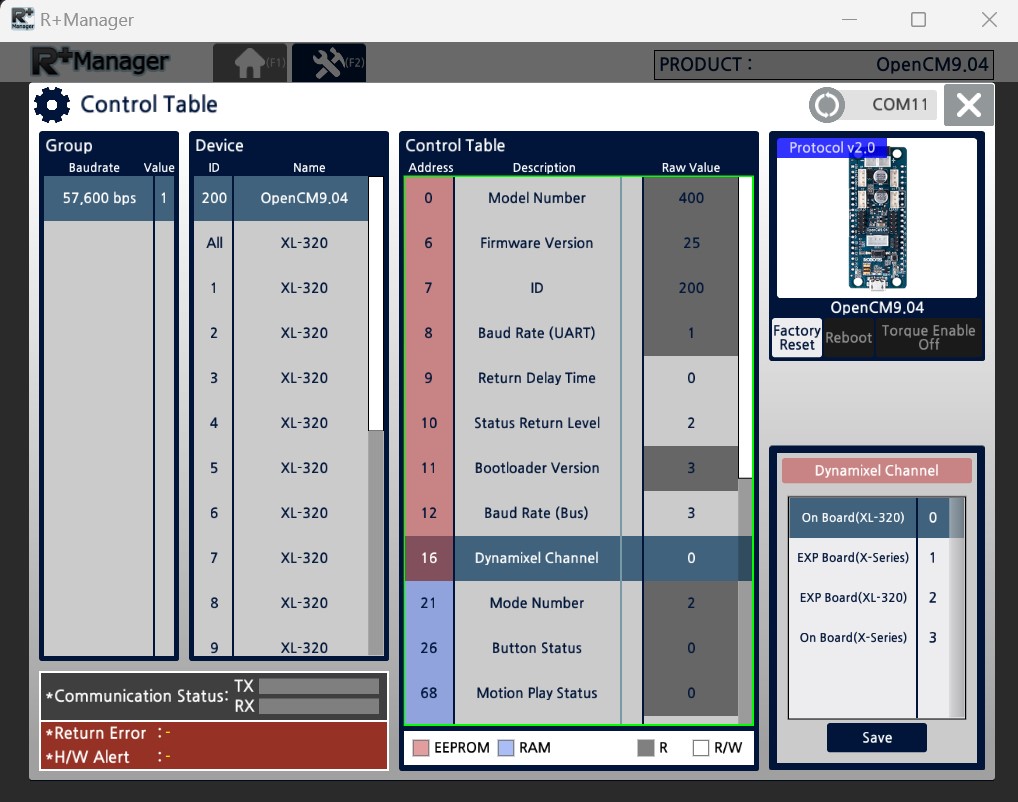
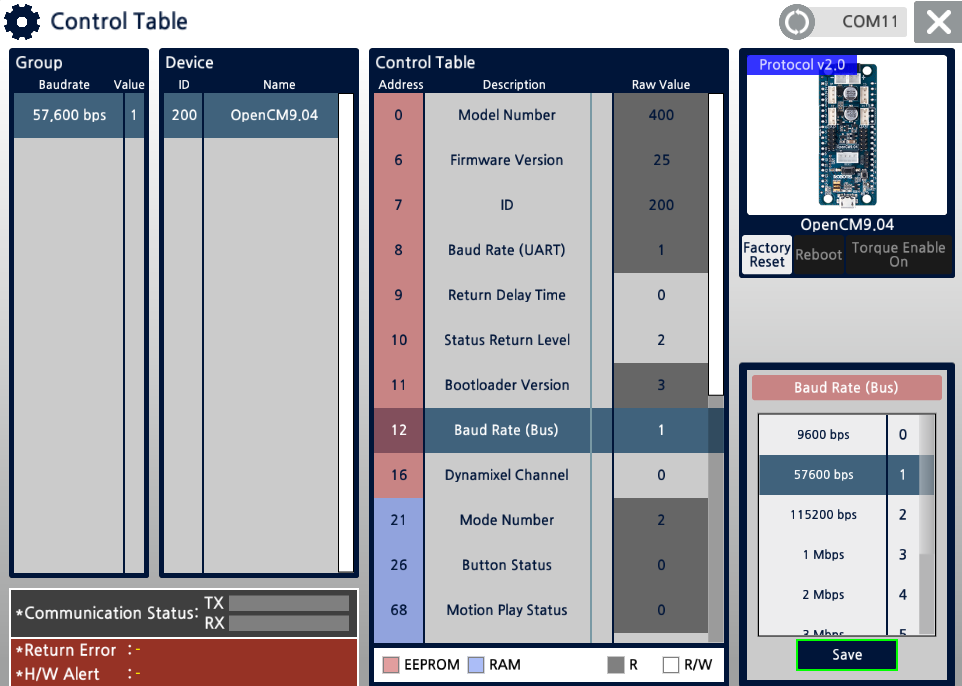
When MANAGER connects to your bot, does MANAGER Window look like this
In particular, does the value for “Dynamixel Channel” equal to “0”?
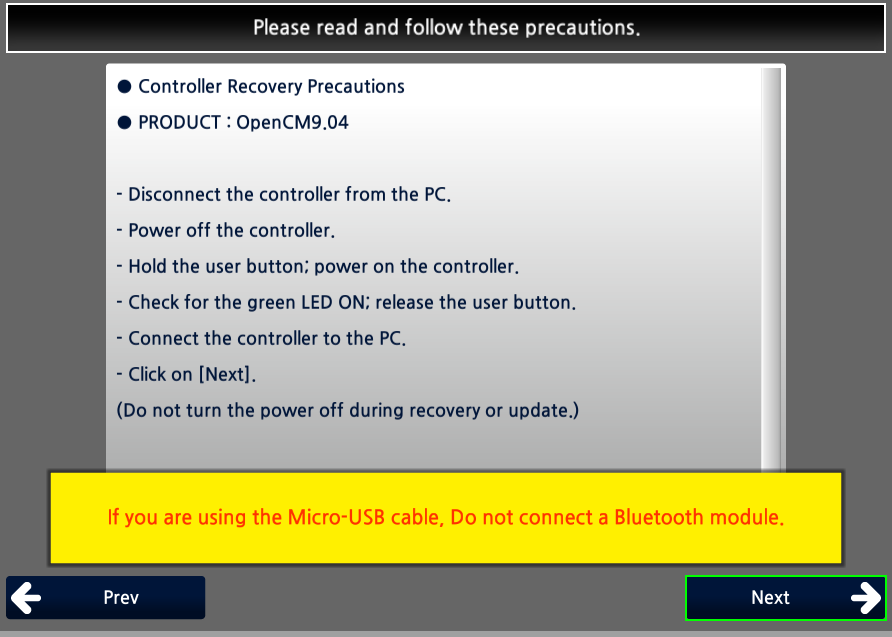
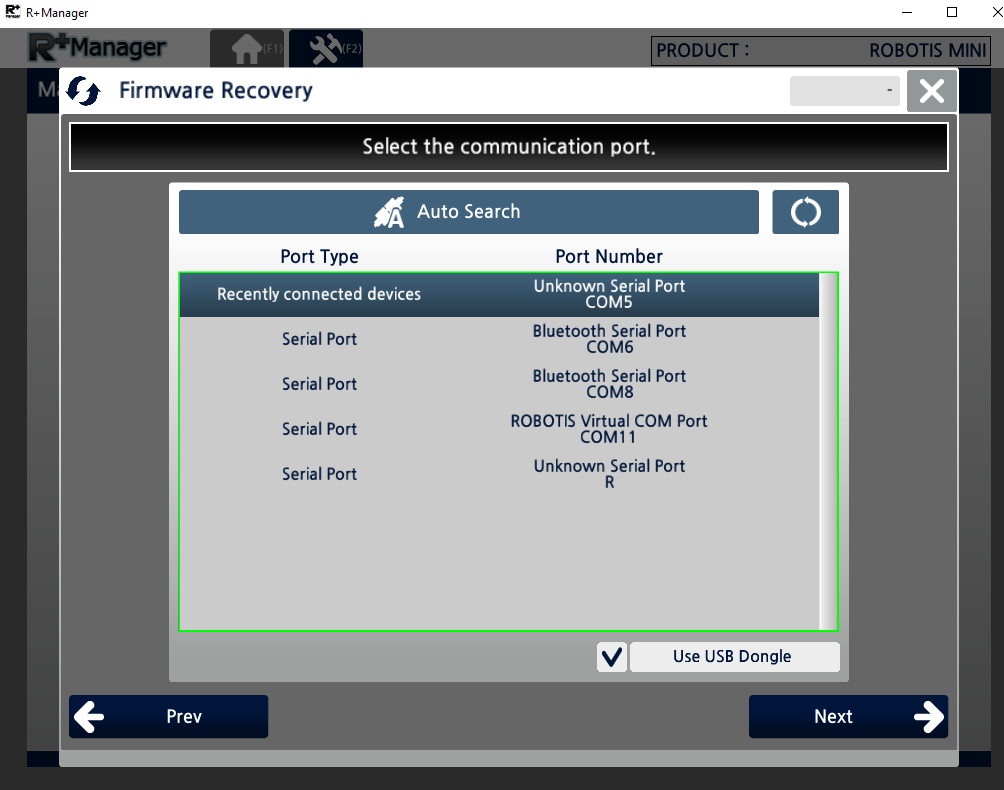
When connecting I am given this page:
To try and recover firmware I proceed to that option following these instructions:
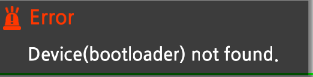
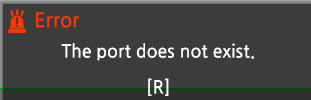
It is here I am unable to connect to my robot. I have no other R+ software open, nor am I connected to bluetooth. Each option fails with varying errors:
Errors include:

Update: I restarted the software and connected to port 11.
I recovered firmware and then accessed Update and Test:
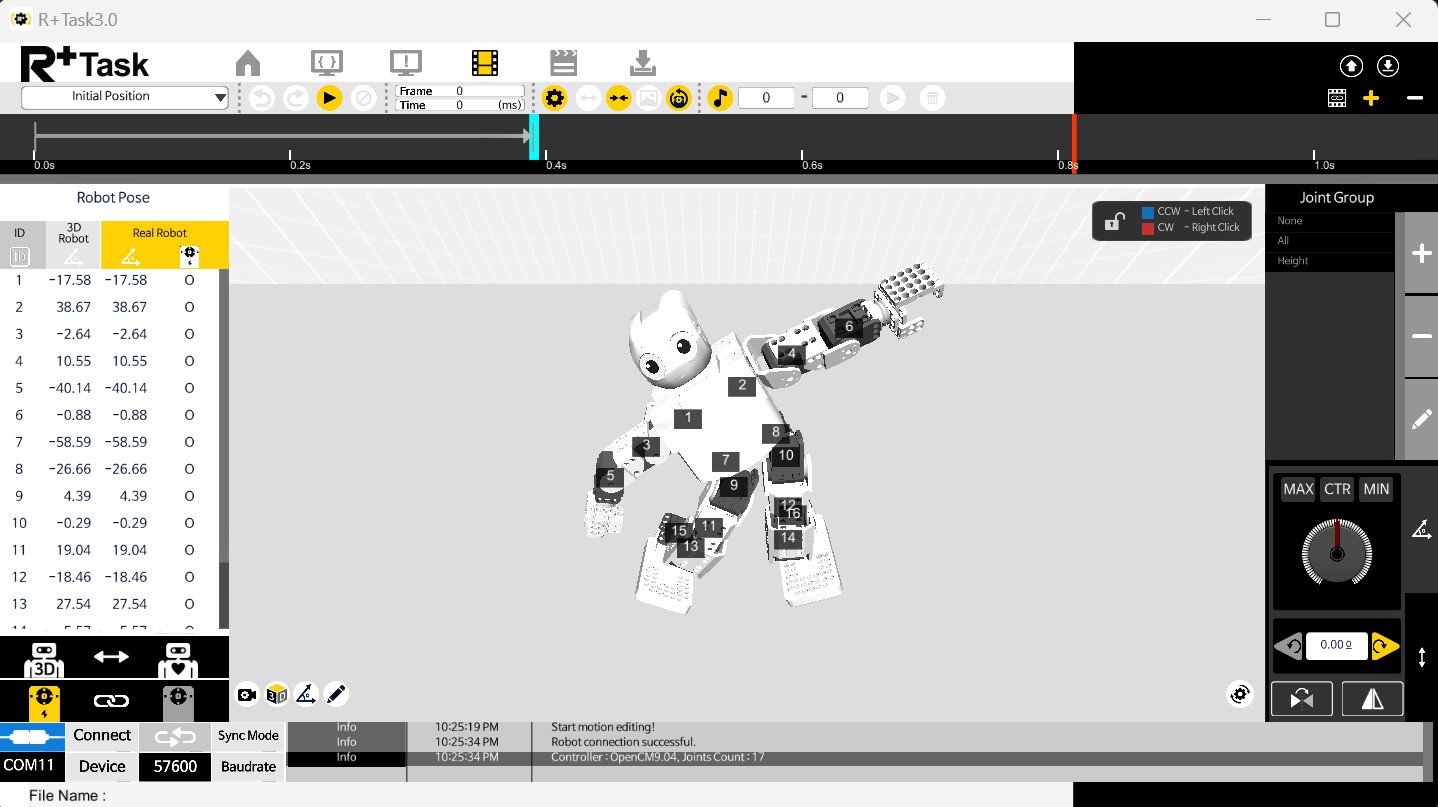
After recovering firmware and resetting factory settings I exited Manager and reconnected via bluetooth to R+ Task 3.0.
I then connected successfully and went to sync it, and it still registers 0 Joints 
@lucdbast - Good that you are making progress!
Your Manager’s screen should have listed all your XL-320s (see my post). But on yours, the XL-320s are not listed.
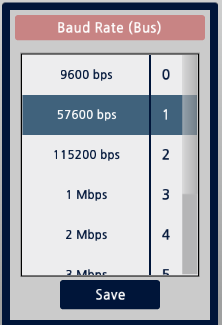
So, I think that the remaining issue is that all your XL-320s may be still set at 57.6 Kbps (factory default value) and right now you got your OpenCM-904 communicating to them at 1 Mbps (i.e. Address 12 “Baud Rate (Bus)” is currently set to 3) - i.e. the controller and the DXLs are not talking to each other at the same communication rate.
Thus can you get back and use Manager to connect to the OpenCM-904 + DXLs again, and change the value of Address 12 to 1 (i.e. to 57.6 Kbps) - see picture below.
Then the MANAGER tool will take some time to readjust to the new comm. rate of 57.6 Kbps and hopefully you will see all your DXLs inside Manager then!
You should also check this free Kindle excerpt from my MINI book, and there are all kinds of hardware information in it
https://www.amazon.com/Programming-Guide-ROBOTIS-MINI-Thai-ebook/dp/B0841P5G15
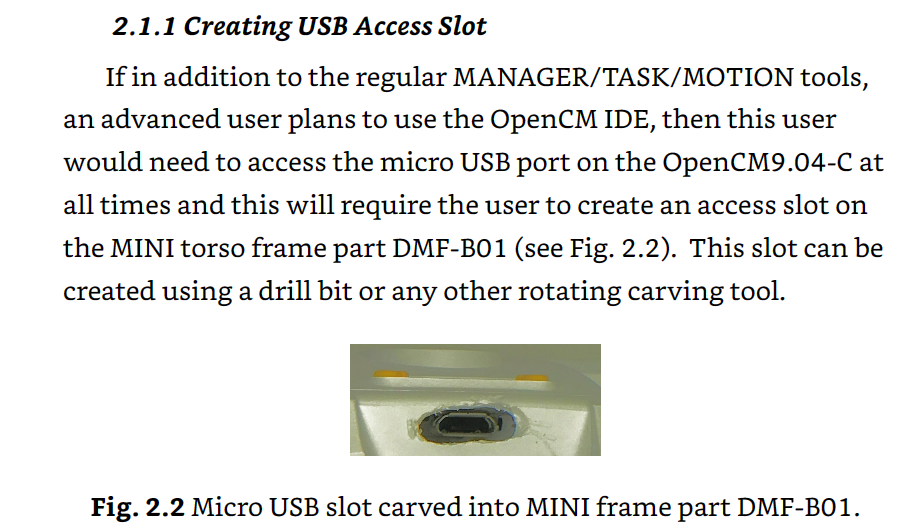
In particular, see if you can make yourself a USB slot as shown below. It will be handy to troubleshoot your robot via USB cable without having to dismantle your MINI every time, like you probably did a few times already.
Your robot will also be ready to use with Arduino, if you ever want to go that way in the future.
1 Like
How long would one expect the OpenCM to take to readjust to the new baudrate? I have connected to the manager tool, changed option 12 making sure to save, waited ~5 minutes, and then exiting from the control table. Even when re-opening the Update and Test control table, it still displays option 12 as set to “1”. However, as soon as I close the manager and connect to R+Task, it still shows 0 joints. After re-opening Manager, option 12 is back to “3”.
Even refreshing inside the Manager doesn’t populate the list of XL-320s I see on the left in yours.

My whole screen:
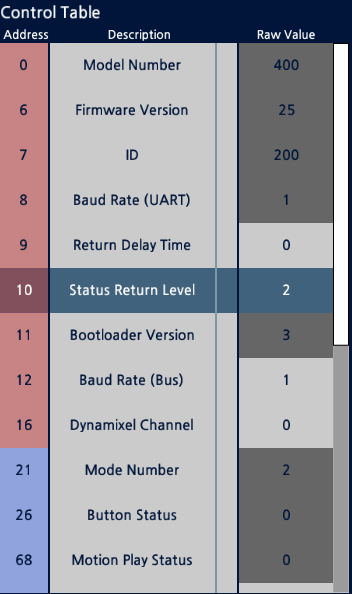
Here are all the settings as seen in manager after having set option 12 equal to “1”:
It is clear the setting for option 12 isn’t sticking once the Manager application is closed. Am I missing a save option other than the one located below the Baudrate option menu?
Thank you for your help and prompt responses!
And I plan to take a detailed look through your E-Book, that is an excellent resource.
@lucdbast
It took my OpenCM-904 only 15-30 seconds to switch the Bus Baud Rate. So, I am stomped and running out of ideas.
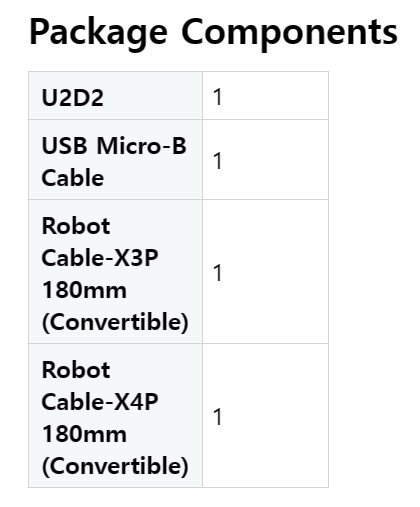
Is your OpenCM-904 new or is it second-handed? Something is amiss with your OpenCM-904 so the only approach I can think of now is to test the XL-320s independently of the OpenCM-904. Do you have a module called U2D2?
and you will need this XL-320 convertible cable.
The U2D2 module is good to have among your ROBOTIS toolbox anyway.
Then you can use the Dynamixel Wizard 2 software to check out and set it their baud rates to 1 Mbps on your XL-320s without going through the OpenCM-904. This way you will determine independently if all your XL-320s are working properly. Then we’ll see what we can do from there.
All the robots are new, but we have had some issues here and there with boards or cables. I can try swapping in another CM904 from a working robot to see if that’s the issue, but long term it still takes a robot out of commission, which is difficult in a class/lab setting.
I do not have U2D2 but will look into getting one, thank you for the reference. Are the cables the same as those that come with the XL320’s when one assembles a robot?
I will update when I am able to get my hands on these materials. Thank you again for your help!
You will need that XL320 convertible cable to connect an XL-320 servo to the regular JST connector on the U2D2.
And if the robots are new you should think about doing an RMA process to have Robotis folks look at the suspect 904.
Unfortunately it looks like ROBOTIS are out of stock of their convertible cables. Do you know if it’s possible to add/replace a JST connector to the standard cables that come with the servo? I’m assuming it would be plug and play, although the connections could be different.
Thanks!
I was afraid of that shortage situation.
The U2D2 does come with a X3P JST-MOLEX compatible cable but for the old DXL connector for AX-type of actuators.
But you should have a bunch of plain XL-320 cables, can you sacrifice one of them by carefully splicing it into the existing X3P JST-MOLEX compatible cable coming with the U2D2? Watch out to keep GRND with GRND and DATA with DATA, (the middle wire is always VDD) then you would have a “unique” compatible DXL cable that would work with AX-12 or XL-320 (one at a time) and a U2D2!!!
Good Luck!