Issue:
Jonathon,
Thank you again for your assistance. I was able to get everything powered up and running, almost exactly as desired. I have run into another problem that I can’t seem to get beyond, though. My code is set up such that I should not require a usb-c connection to the laptop once the sketch is uploaded to the openrb-150, yet my xh540-v270-R won’t initialize unless I run a scan with the dynamixel wizard scan tool after uploading the code. It’s the weirdest thing, because last week when I ran the code initially, I didn’t have to do the scan or mess with the wizard to get the servo to initialize, but it still wouldn’t operate in standalone mode with either a 12v power supply connected to V-In or a usb-c to wall power connection for the openrb-150. So far it will ONLY run while connected to a PC.
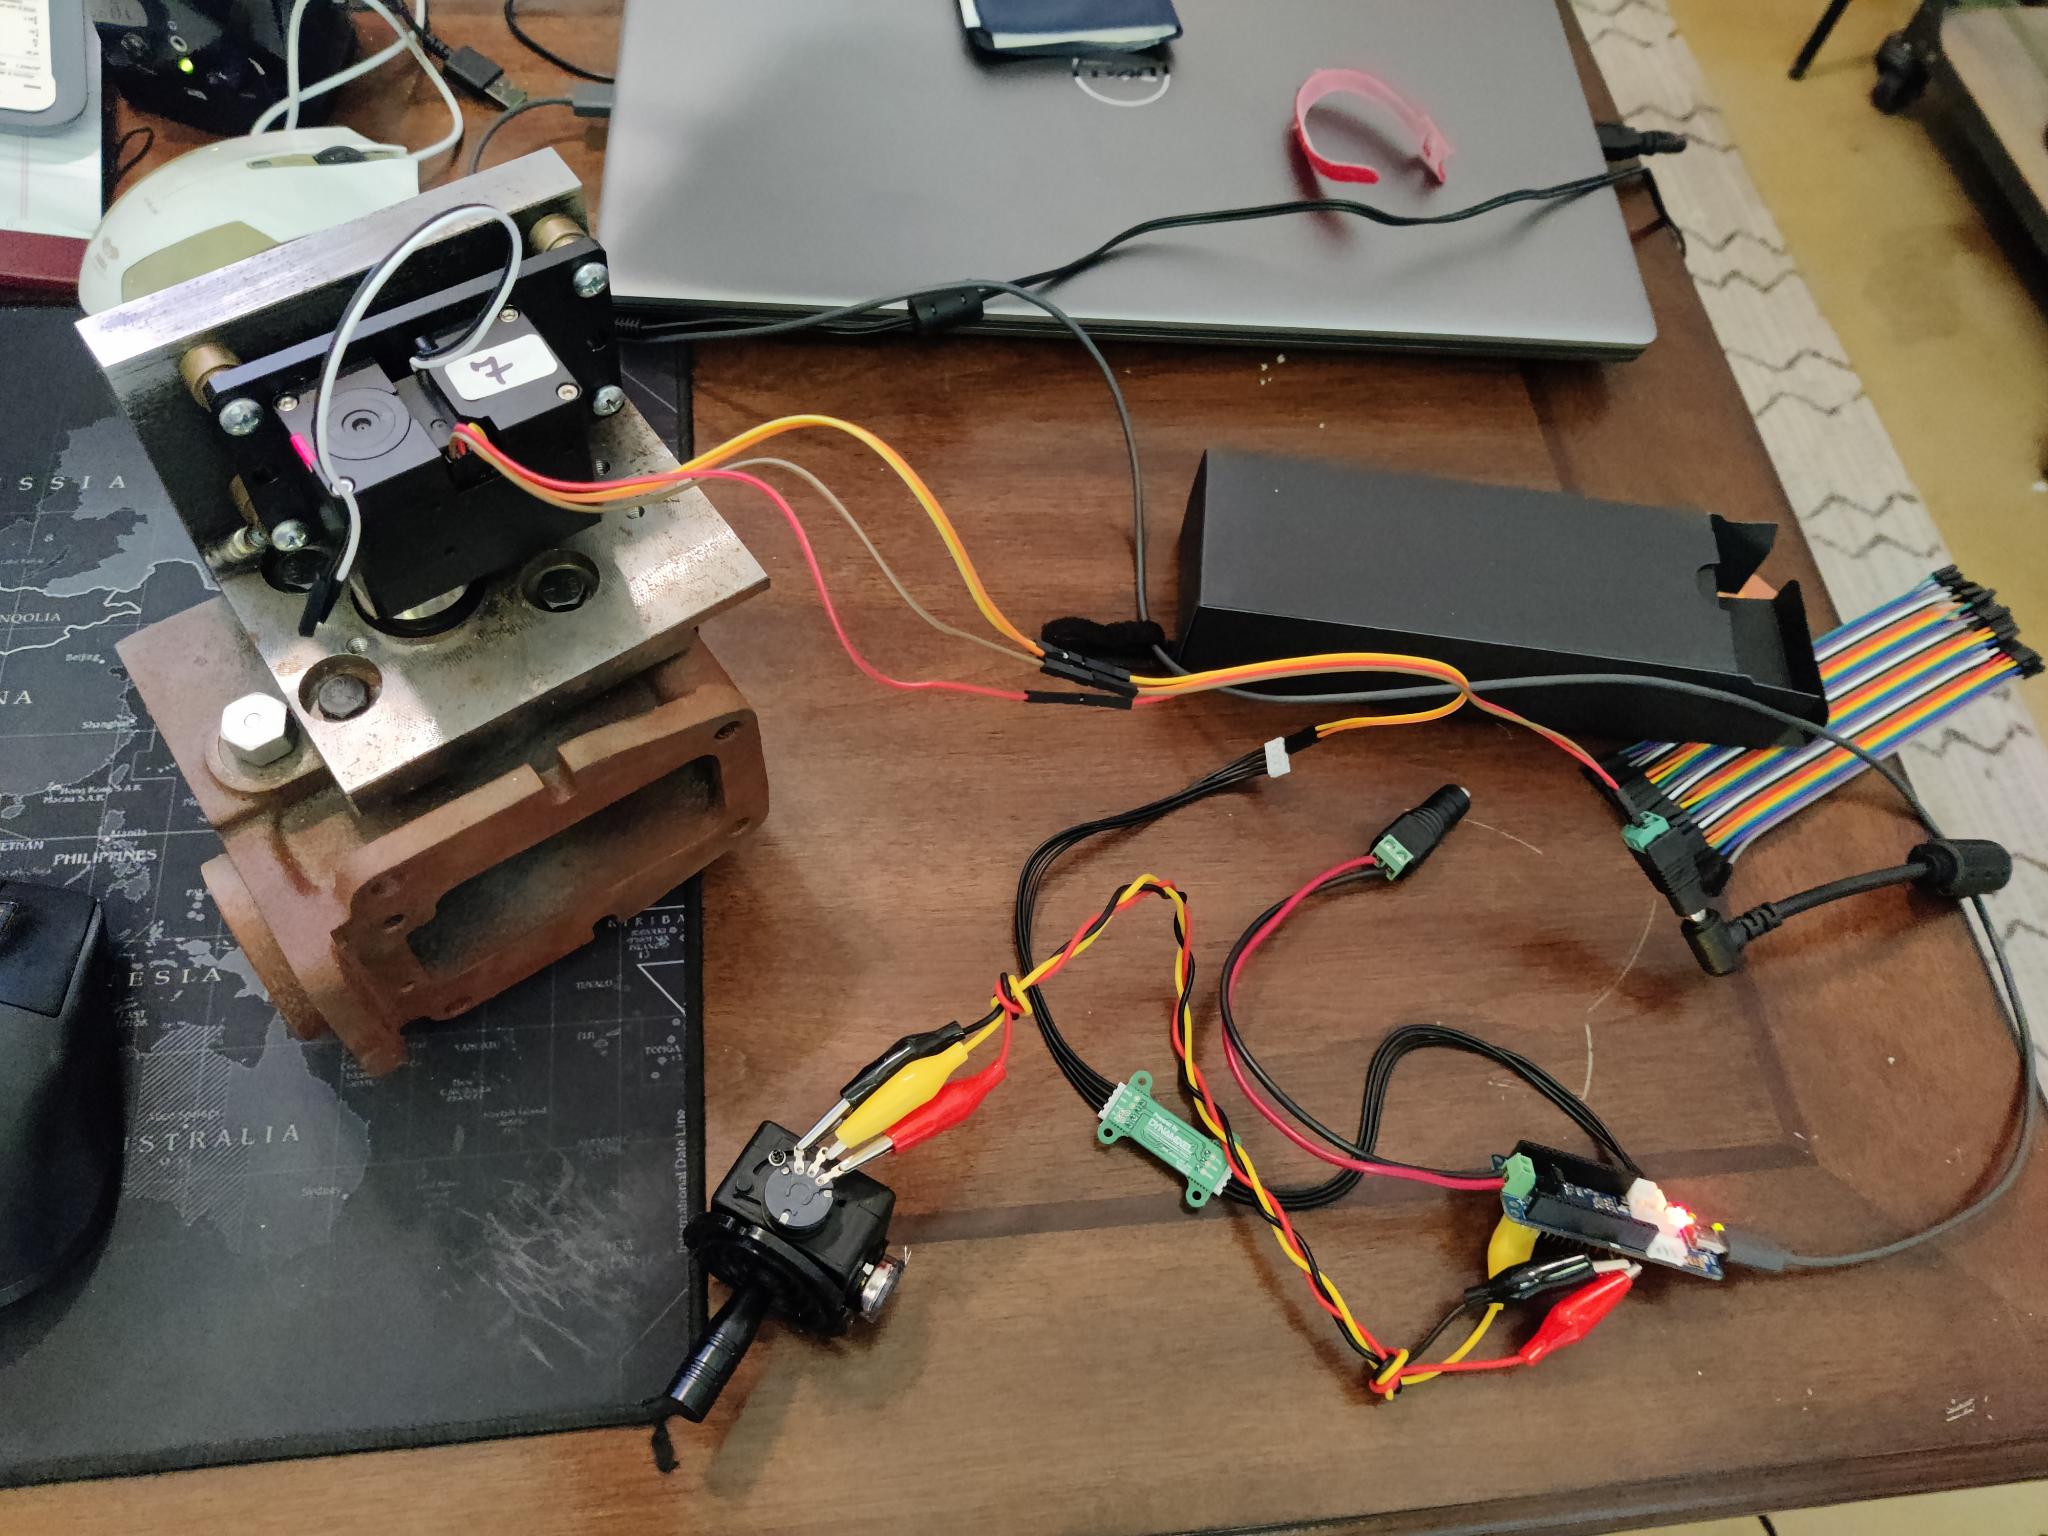
Any advice? I have included my code below for reference as well as a quick photo of the setup as it sits.
I am running a 10k pot analog joystick to A6 on the openrb-150, then using the dynamixel bridge via tp12 to communicate with the servo. I am powering the servo separately using a 24v brick. Everything works properly when hooked up to a PC.
#include <Dynamixel2Arduino.h>
// Please modify it to suit your hardware.
#if defined(ARDUINO_AVR_UNO) || defined(ARDUINO_AVR_MEGA2560) // When using DynamixelShield
#include <SoftwareSerial.h>
SoftwareSerial soft_serial(7, 8); // DYNAMIXELShield UART RX/TX
#define DXL_SERIAL Serial
#define DEBUG_SERIAL soft_serial
const int DXL_DIR_PIN = 2; // DYNAMIXEL Shield DIR PIN
#elif defined(ARDUINO_SAM_DUE) // When using DynamixelShield
#define DXL_SERIAL Serial
#define DEBUG_SERIAL SerialUSB
const int DXL_DIR_PIN = 2; // DYNAMIXEL Shield DIR PIN
#elif defined(ARDUINO_SAM_ZERO) // When using DynamixelShield
#define DXL_SERIAL Serial1
#define DEBUG_SERIAL SerialUSB
const int DXL_DIR_PIN = 2; // DYNAMIXEL Shield DIR PIN
#elif defined(ARDUINO_OpenCM904) // When using official ROBOTIS board with DXL circuit.
#define DXL_SERIAL Serial3 //OpenCM9.04 EXP Board’s DXL port Serial. (Serial1 for the DXL port on the OpenCM 9.04 board)
#define DEBUG_SERIAL Serial
const int DXL_DIR_PIN = 22; //OpenCM9.04 EXP Board’s DIR PIN. (28 for the DXL port on the OpenCM 9.04 board)
#elif defined(ARDUINO_OpenCR) // When using official ROBOTIS board with DXL circuit.
// For OpenCR, there is a DXL Power Enable pin, so you must initialize and control it.
// Reference link : OpenCR/arduino/opencr_arduino/opencr/libraries/DynamixelSDK/src/dynamixel_sdk/port_handler_arduino.cpp at master · ROBOTIS-GIT/OpenCR · GitHub
#define DXL_SERIAL Serial3
#define DEBUG_SERIAL Serial
const int DXL_DIR_PIN = 84; // OpenCR Board’s DIR PIN.
#elif defined(ARDUINO_OpenRB) // When using OpenRB-150
//OpenRB does not require the DIR control pin.
#define DXL_SERIAL Serial1
#define DEBUG_SERIAL Serial
const int DXL_DIR_PIN = -1;
#else // Other boards when using DynamixelShield
#define DXL_SERIAL Serial1
#define DEBUG_SERIAL Serial
const int DXL_DIR_PIN = 2; // DYNAMIXEL Shield DIR PIN
#endif
// Joystick settings
#define JOYSTICK_PIN A6
#define JOYSTICK_MIN 0
#define JOYSTICK_MAX 1023
#define JOYSTICK_DEADZONE 20
// Servo settings
#define SERVO_MIN_ANGLE -30
#define SERVO_MAX_ANGLE 30
const uint8_t DXL_ID = 1;
const float DXL_PROTOCOL_VERSION = 2.0;
Dynamixel2Arduino dxl(DXL_SERIAL, DXL_DIR_PIN);
//This namespace is required to use Control table item names
using namespace ControlTableItem;
void setup() {
// Initialize serial communication for debugging
Serial.begin(115200);
while (!Serial);
// Initialize Dynamixel servo
dxl.begin(57600);
dxl.ping(DXL_ID);
dxl.setOperatingMode(DXL_ID, OP_POSITION); // Set operating mode to position control
dxl.torqueOn(DXL_ID);
// turn on LED to confirm servo initialization
dxl.writeControlTableItem(LED, DXL_ID, 1);
// Limit the maximum velocity in Position Control Mode. Use 0 for Max speed
dxl.writeControlTableItem(PROFILE_VELOCITY, DXL_ID, 12);
// Add a delay after power-on to allow servo initialization
delay(1000); // Adjust delay time as needed
}
void loop() {
int joystickValue = analogRead(JOYSTICK_PIN);
// Print the raw joystick value
Serial.print("Joystick Value: ");
Serial.println(joystickValue);
// Apply deadzone to joystick value
if (abs(joystickValue - (JOYSTICK_MAX / 2)) < JOYSTICK_DEADZONE) {
joystickValue = JOYSTICK_MAX / 2;
}
// Map joystick value to servo angle
float servoAngle = map(joystickValue, JOYSTICK_MIN, JOYSTICK_MAX, SERVO_MIN_ANGLE, SERVO_MAX_ANGLE);
// Set servo goal position
dxl.setGoalPosition(DXL_ID, servoAngle, UNIT_DEGREE);
// Read and print the current servo position
float presentPosition = dxl.getPresentPosition(DXL_ID, UNIT_DEGREE);
Serial.print("Present Position (degree): ");
Serial.println(presentPosition);
delay(10);
}
DYNAMIXEL Servo:
XH540-V270-R
DYNAMIXEL Controller:
OPENRB-150 WITH DYNAMIXEL COMMUNICATION BRIDGE
Software Interface:
ARDUINO IDE 2.3.2 POSITION MODE, AND FOR SOME REASON HAVING TO USE DYNAMIXEL WIZARD TO GET SERVO TO INITIALIZE