Hello!
My name is Jonathon, and I’m the Technical Specialist at ROBOTIS INC. Welcome to my first blogpost here on the ROBOTIS Community forum!
Going forward, this blog will be a place that I can regularly share some DYNAMIXEL tips and tricks that I have learned during my time here at ROBOTIS. Today, I wanted to start off with a simple topic that lines up with the theme of new beginnings:
Setting ID’s on Your New DYNAMIXEL
If you have ever received a new set of DYNAMIXEL Smart Servos, and had trouble setting up all your new servos at the same time, you know that one of the first steps before you put any new DYNAMIXEL servos into any projects that you have to assign the new servos some unique ID numbers. Without this important step, all the DYNAMIXEL servos that you have connected won’t respond to any instructions at all! This is because DYNAMIXELs use their ID numbers to identify themselves on the DXL network, so that when you send instructions to your servos the right ones do the right things.
There are a few different ways to define the ID’s of your DYNAMIXEL servos, but the easiest way to do so is using ROBOTIS’ DYNAMIXEL Wizard 2.0 Software. Traditionally, this process would involve connecting your servos one by one to your PC and individually assigning new IDs to each DYNAMIXEL one by one. Assigning IDs this way was slow and cumbersome, but now DYNAMIXEL Wizard features a new ID Inspection Tool that makes this process much faster, and more convenient.
ID Inspection
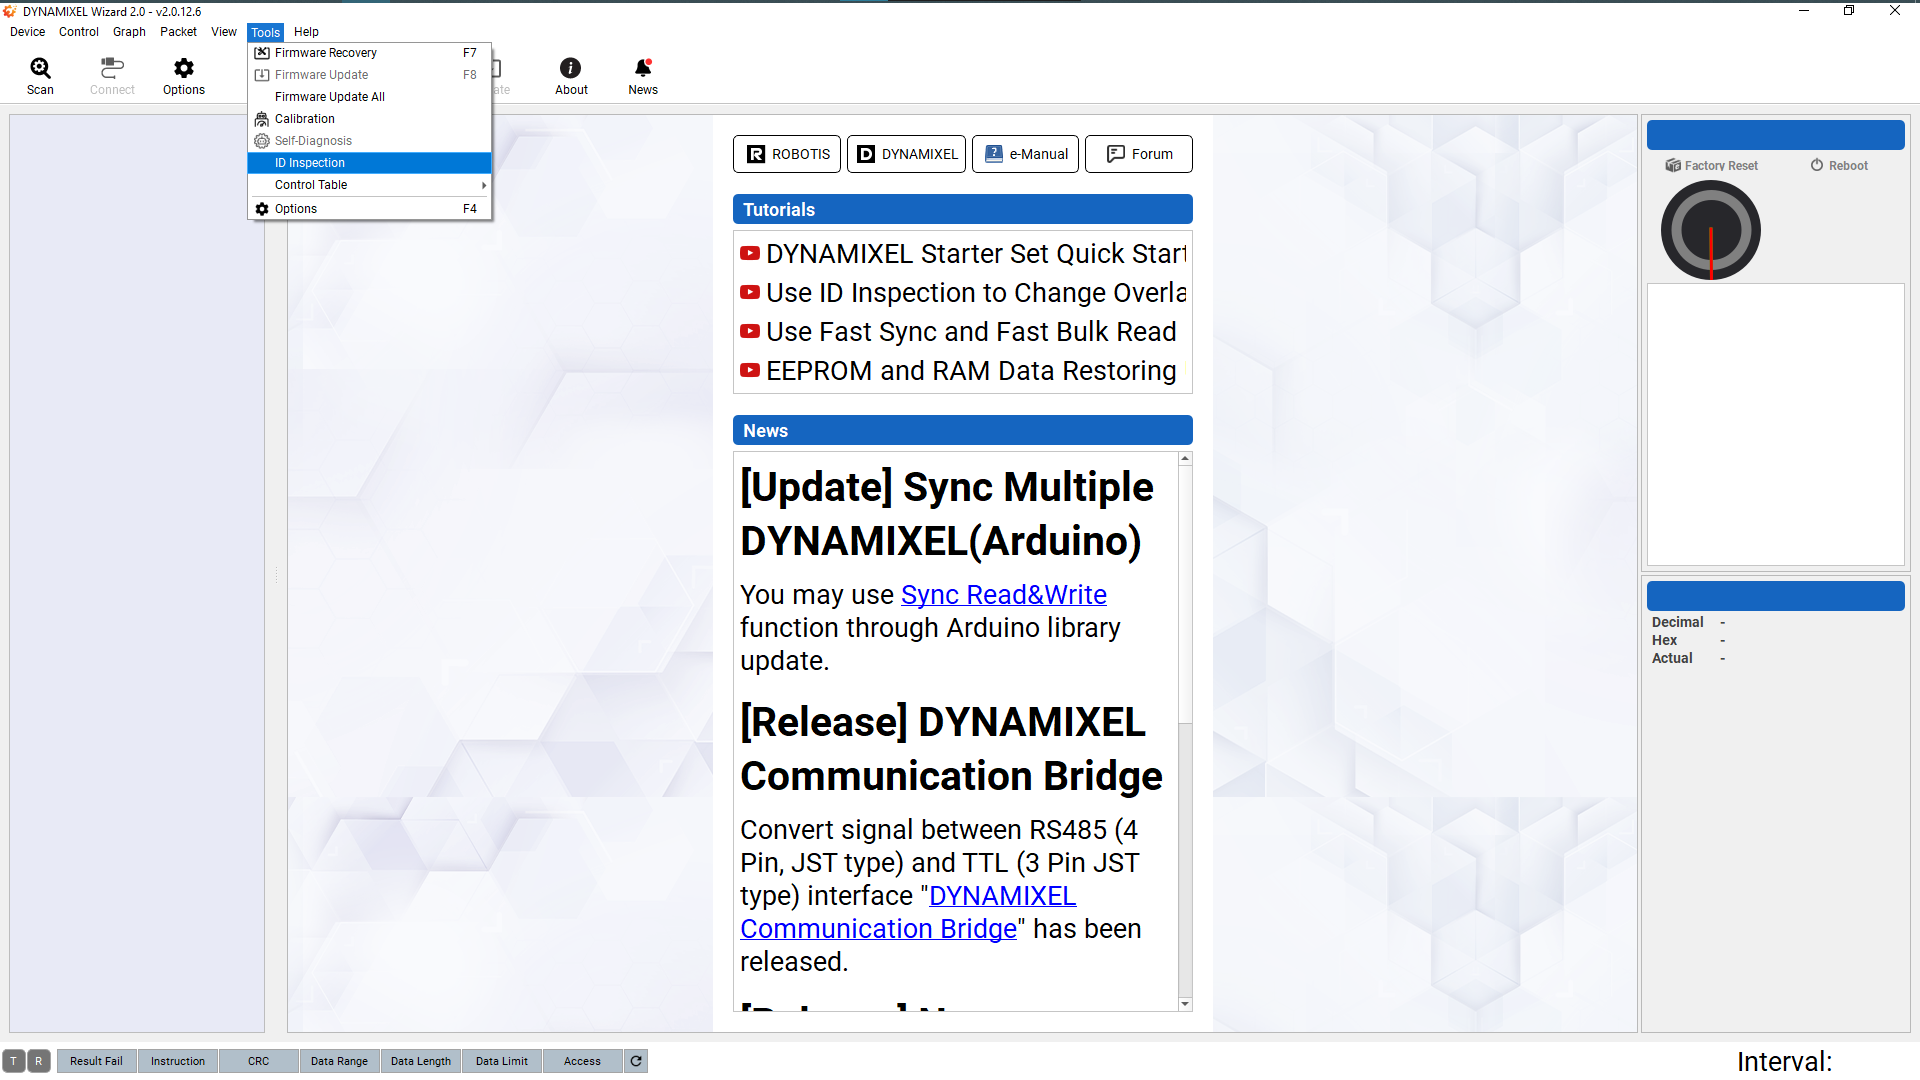
The ID inspection mode can be entered in DYNAMIXEL Wizard by clicking on the Tools tab in the tool bar at the top of the main menu, and selecting ID Inspection from the drop down menu.
This will open the ID Inspection window. On this window there are two drop down selection boxes, one for selecting the serial port, and another for selecting the baud rate of your connected servos. Be sure to choose the correct values for each of these, otherwise your DYNAMIXEL servos will not be found by the inspector. If you are unsure of the baud rate of the servos the default value of new DYNAMIXELs is 57600bps, and should be selected by default.
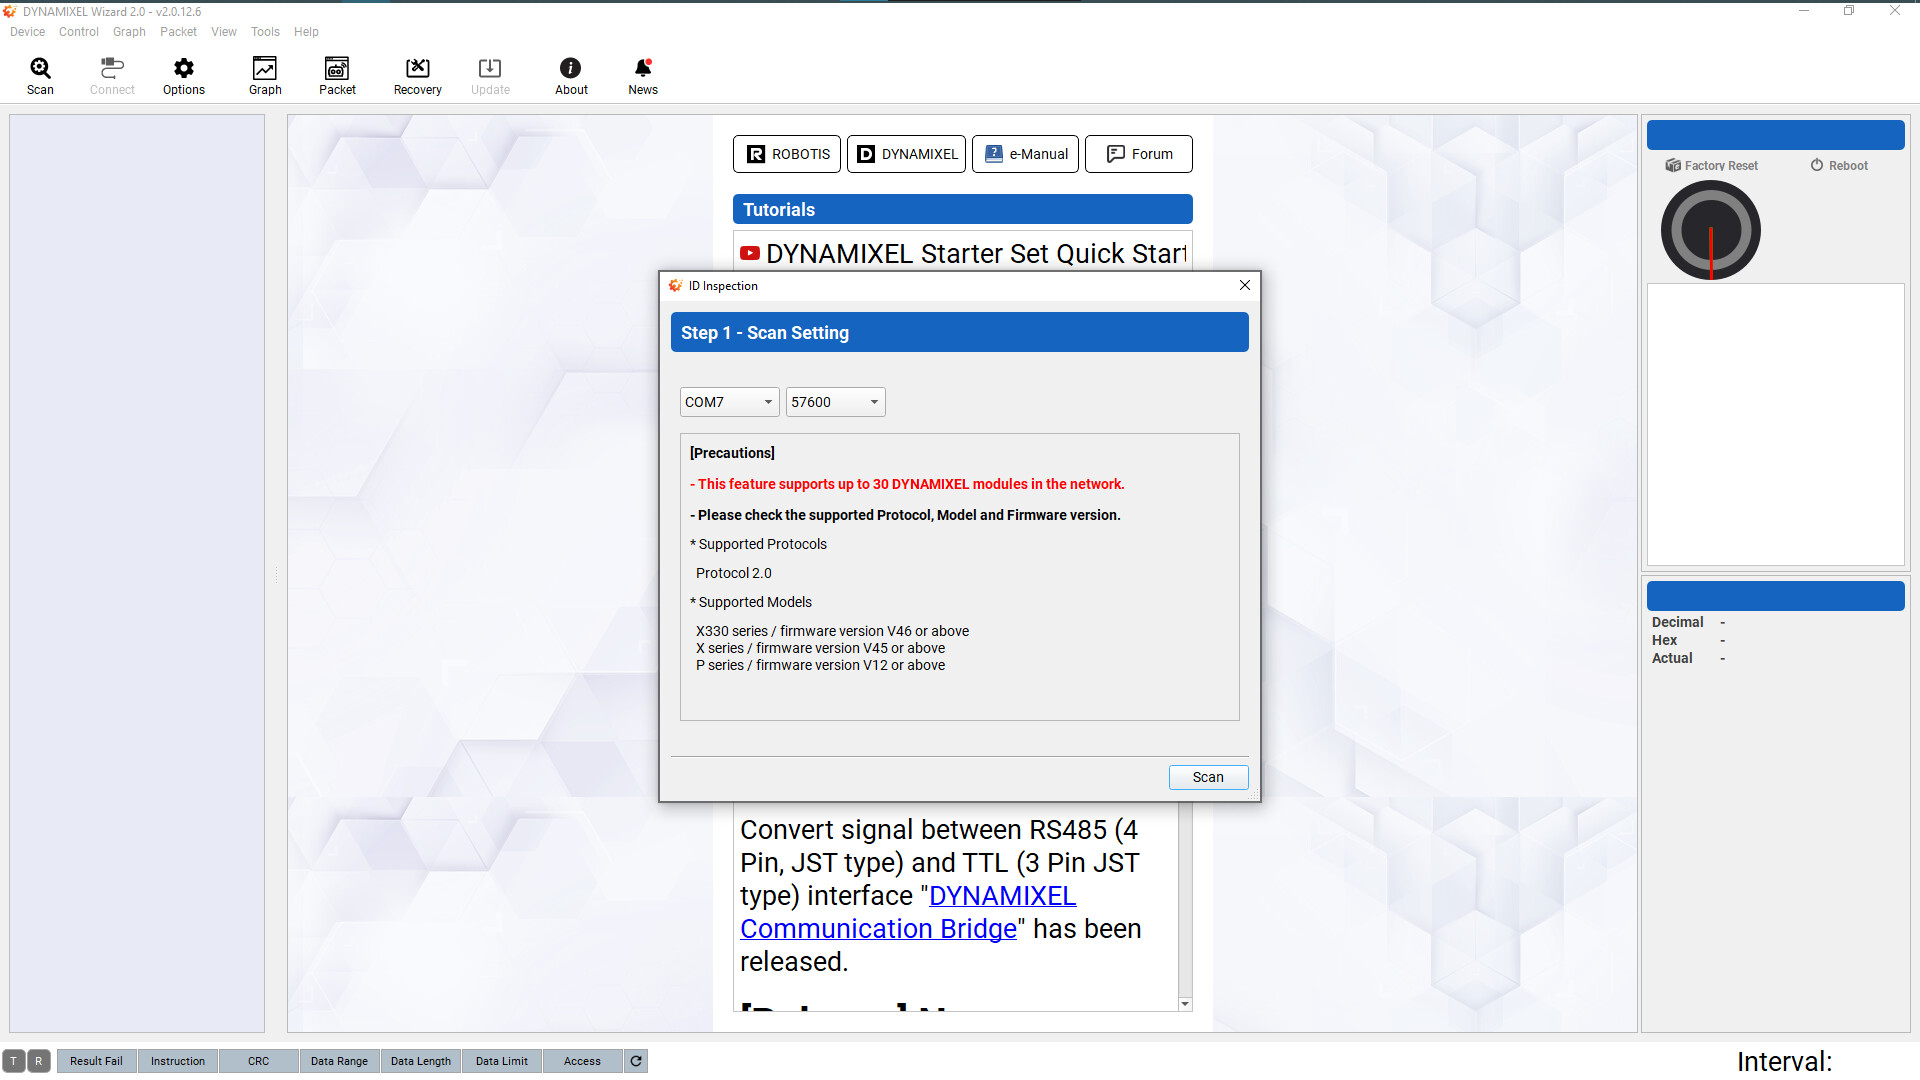
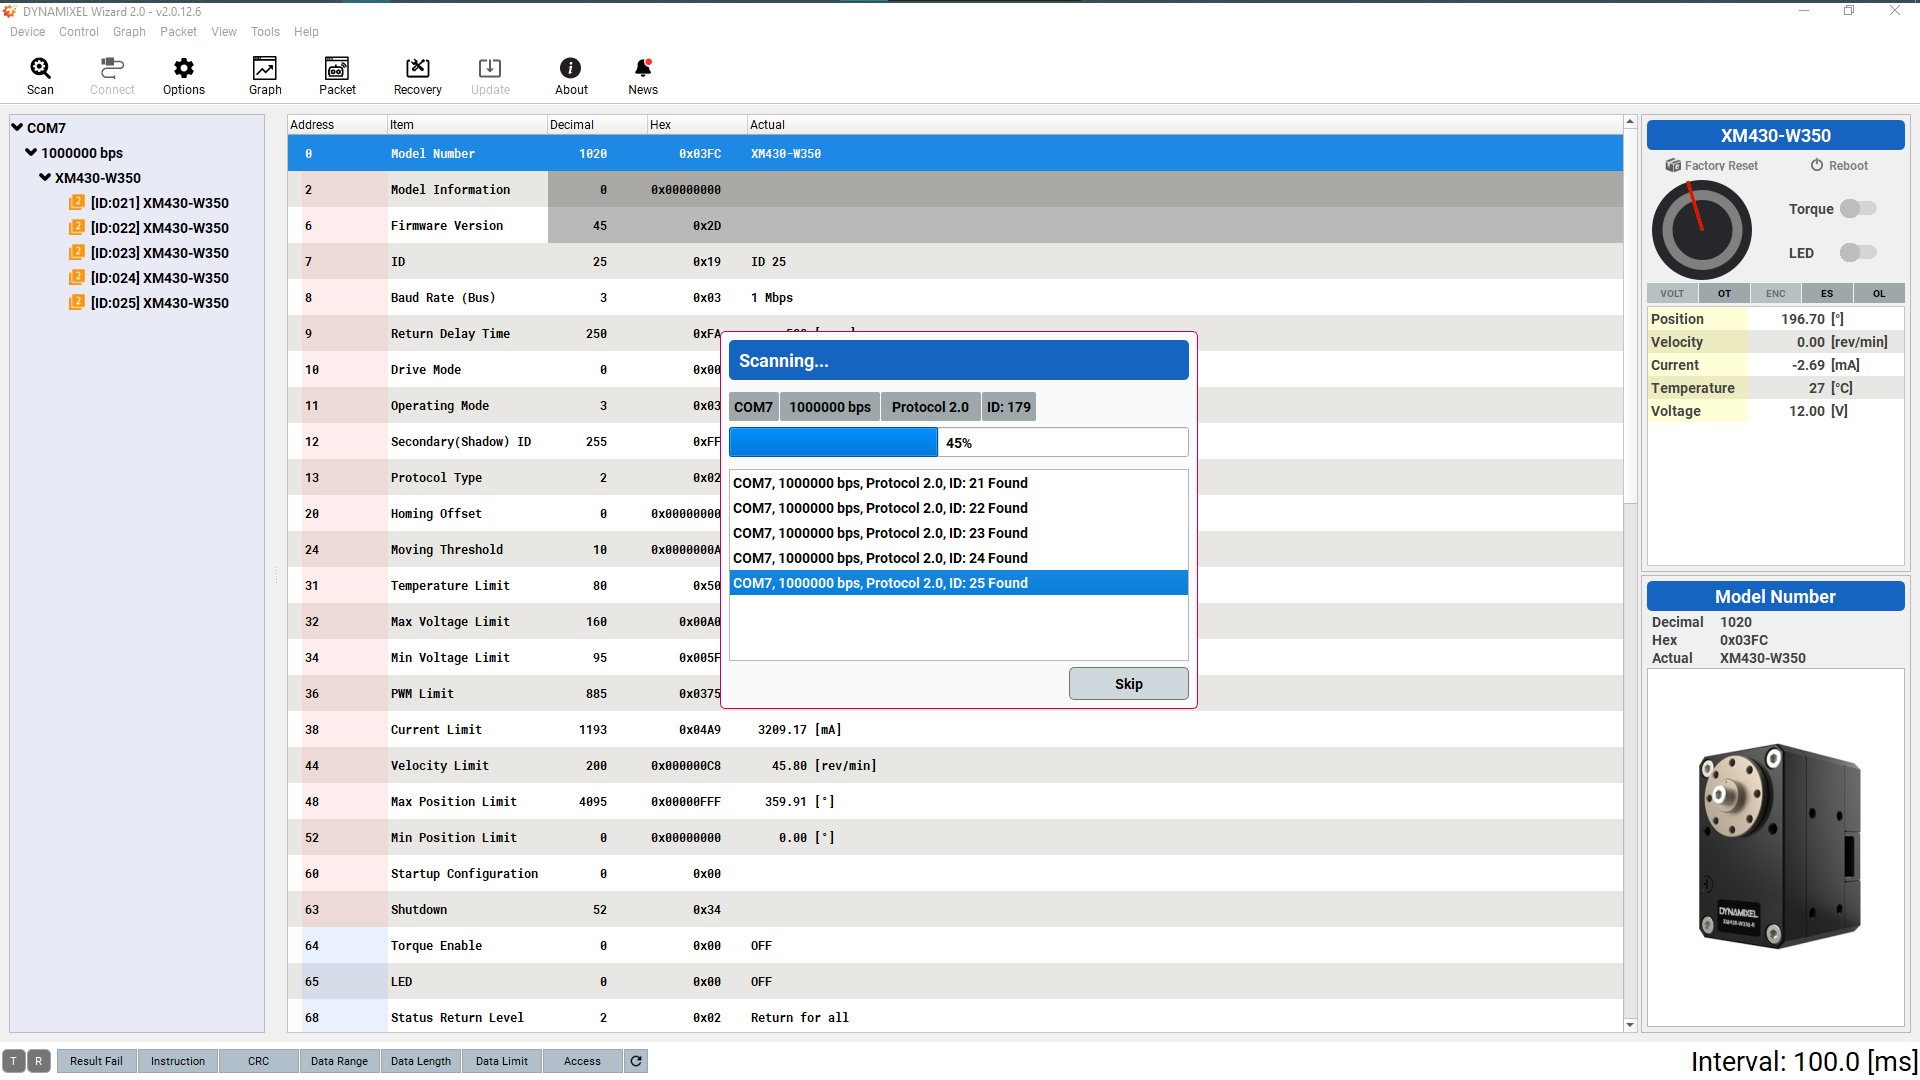
Once the correct options for your DYNAMIXEL System have been selected, press the Scan button to start searching for your DYNAMIXEL. As the search finds your connected DYNAMIXELs, the box in the middle of the window will populate with indicators showing the ID number of any detected DYNAMIXEL.
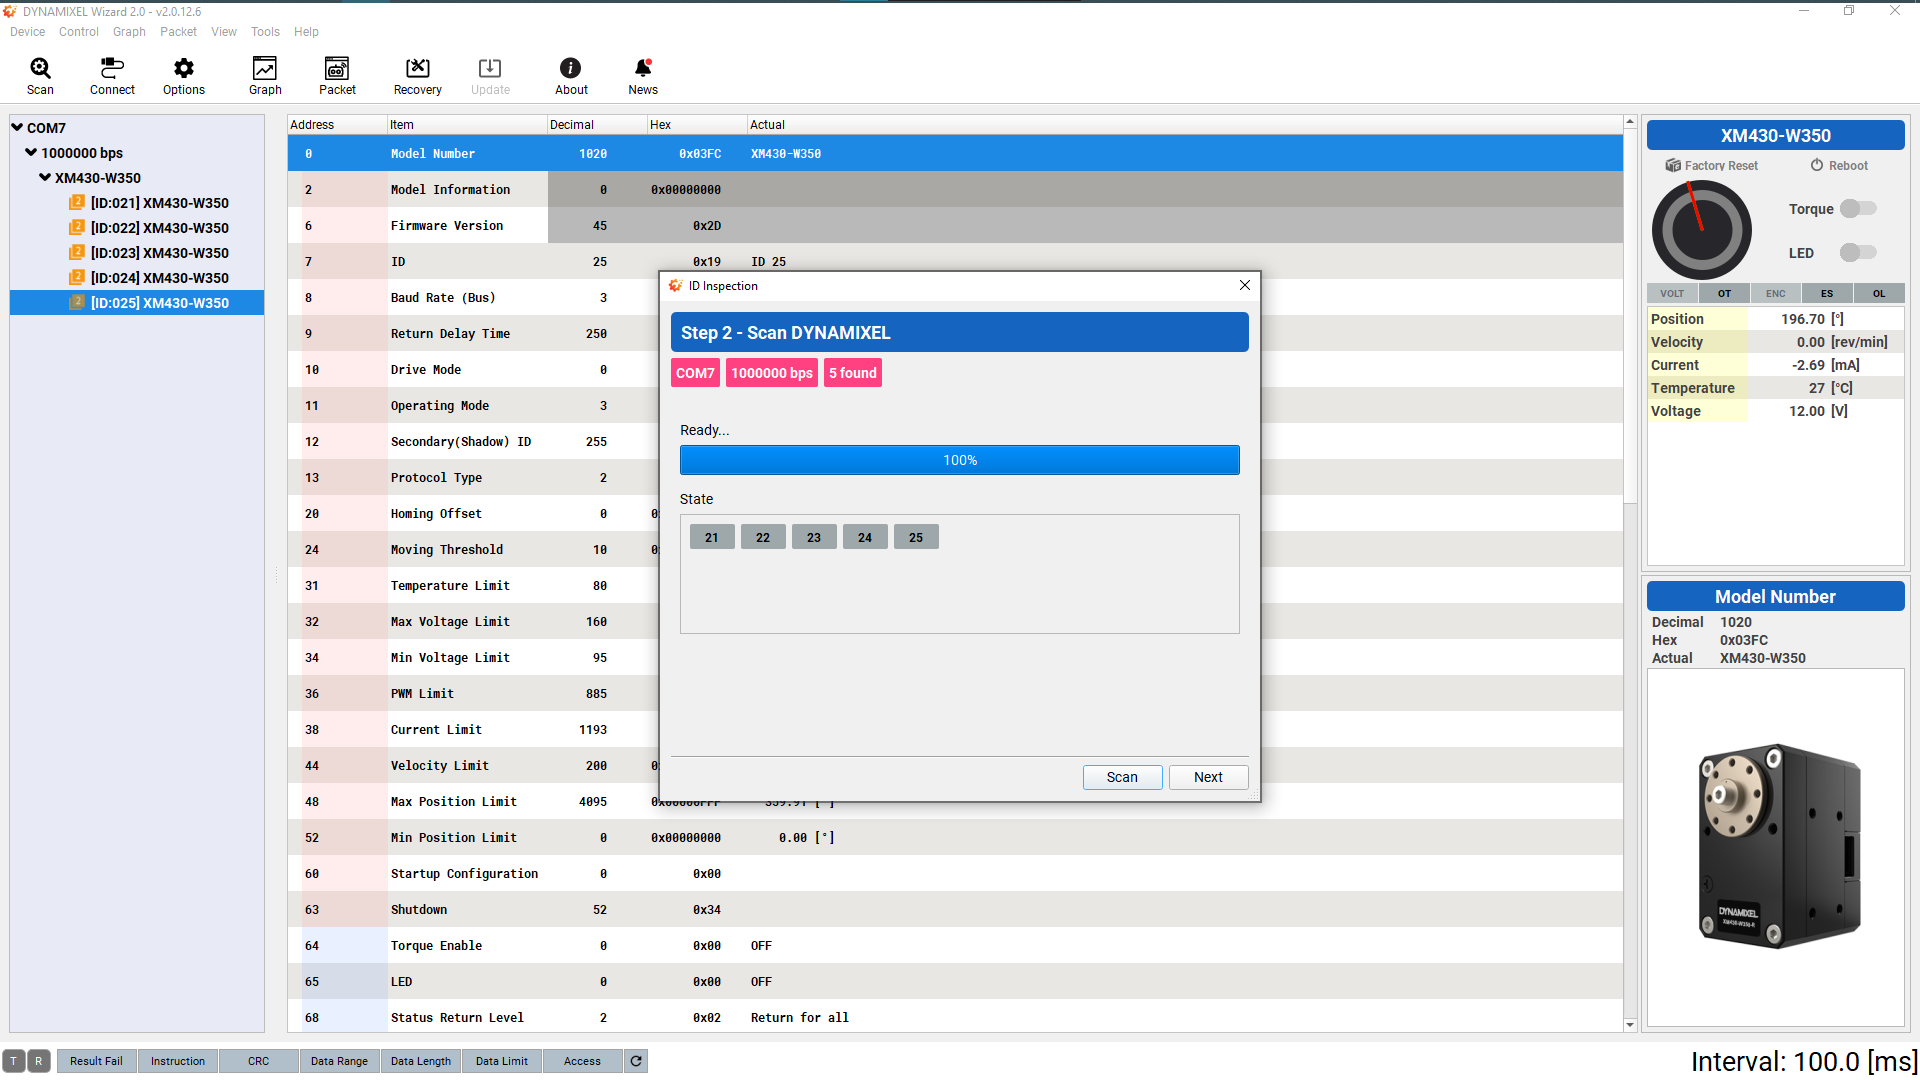
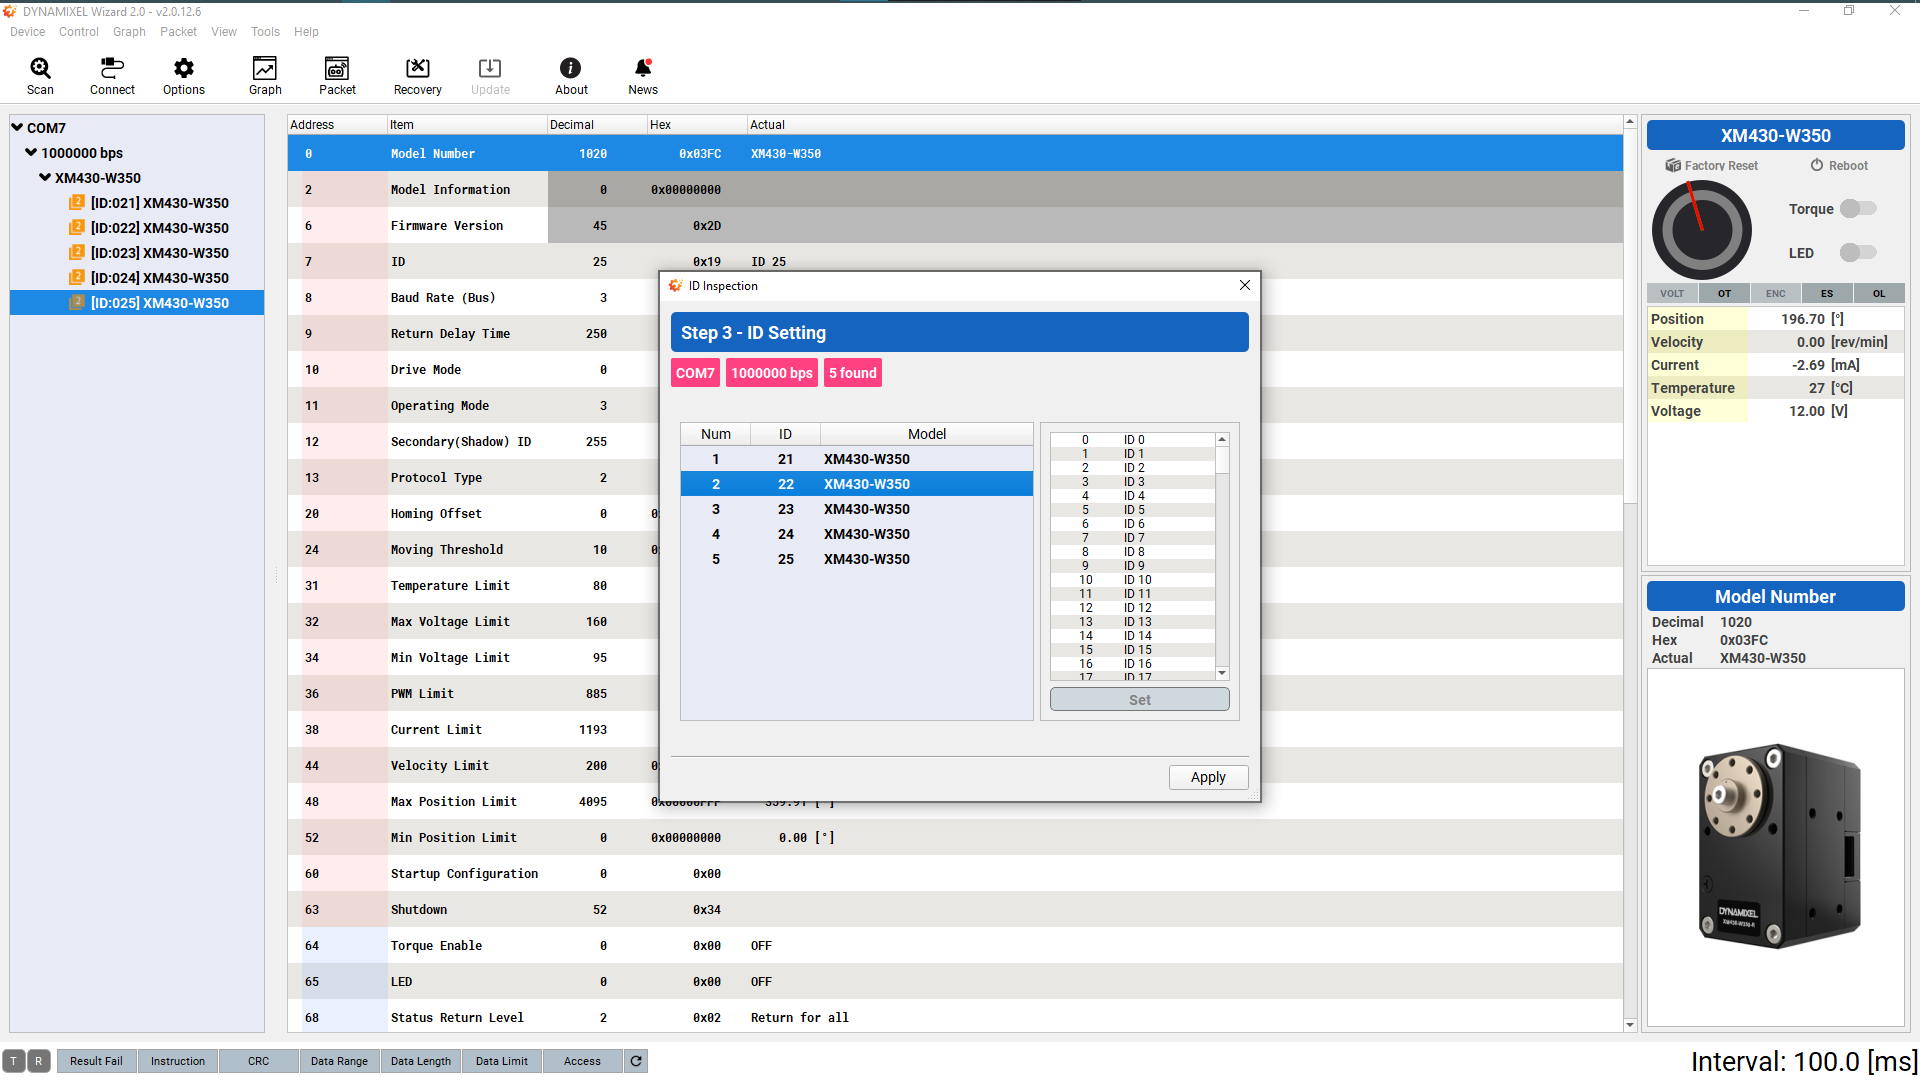
When the search is complete, press Next and you will be taken to a screen showing a list of all connected DYNAMIXELs and a panel that you can use to select new IDs to assign to your servos. Clicking on a servo’s listing in the list will cause it’s indicator light to start blinking, so that you can easily identify which servo you are configuring. When asigning IDs to servos in the right hand panel, DYNAMIXEL Wizard will automatically remove any previously assigned number from the selecton to prevent you from accidentally assinigning colliding IDs. Once you have finished choosing IDs, be sure to press the Apply button, otherwise your new ID values will not be saved to the actuators.
After this process has completed, I reccomend performing a full DYNAMIXEL scan to confirm that your new ID values have been saved to your connected servos.
DYNAMIXEL Wizard’s ID Inspection feature provides a quick and easy way to set IDs for batches of DYNAMIXELs at once, and should prove an invaluable tool to any frequent DYNAMIXEL user. I look forward to sharing more tips and tricks with you here in the future.